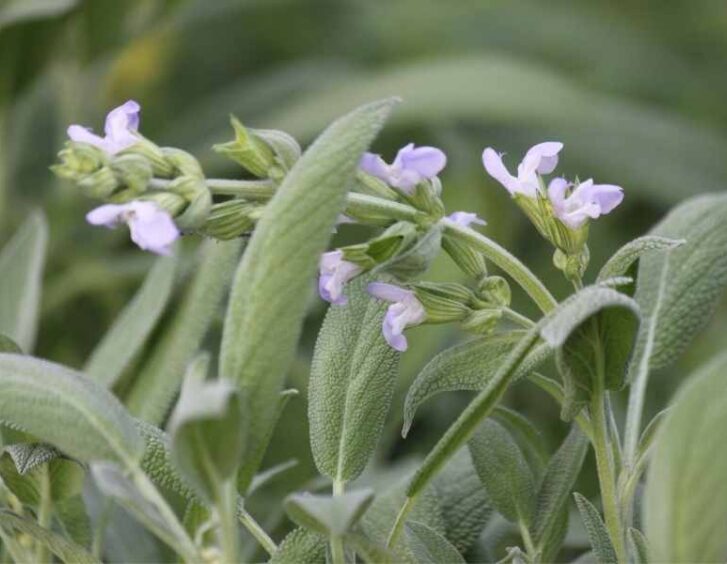
To grow sage seeds successfully, it is important to start by selecting organic seeds and preparing a seed-starting mix with peat moss, vermiculite, and perlite. Plant the seeds a quarter inch deep in moist trays, cover them for a greenhouse effect, and ensure they receive 6-8 hours of sunlight daily. Keeping the soil consistently moist, watering gently at the base in the morning, and providing balanced fertilizer as the plants mature are essential steps. It is also crucial to transplant seedlings carefully, prune regularly for healthy growth, and harvest fresh sage leaves in the early morning for the best flavor. Remember to troubleshoot common issues like pests and diseases by ensuring good air circulation and practicing proper watering techniques, which will help you grow sage successfully and enjoy a bountiful harvest of aromatic leaves.
Key Takeaways
- Choose organic sage seeds for best quality.
- Follow germination techniques like stratification.
- Provide 6-8 hours of sunlight for seedlings.
- Water in the morning at the base to prevent root rot.
- Combat pests with insecticidal soap or neem oil.
Selecting the Right Sage Seeds
When selecting sage seeds, always opt for organic varieties to guarantee the best quality for your garden. Organic seeds make sure that you're starting with a clean, chemical-free foundation for your sage plants. Before purchasing, check the packaging for information on seed storage. Make sure the seeds have been stored properly to maintain their viability.
Germination techniques are important for successfully growing sage from seeds. To kickstart the germination process, consider using a technique called stratification. This involves exposing the seeds to a period of cold and damp conditions to mimic the natural environment they'd experience outdoors. Another method is scarification, where the hard seed coat is gently scratched or nicked to help water penetrate and initiate germination. Whichever technique you choose, make sure to follow the instructions carefully to give your sage seeds the best chance of sprouting.
When you have your organic sage seeds ready, take the time to prepare the right growing conditions. By selecting high-quality seeds and using proper germination techniques, you're setting yourself up for success in growing your own sage plants. Remember, each step you take in the seed selection process contributes to the overall health and vitality of your future sage garden.
Preparing the Seed-Starting Mix
To prepare the seed-starting mix effectively, gather the essential ingredients and follow a simple recipe for best growth results. The soil composition of your seed-starting mix is important for healthy seedling growth. You'll need a blend of peat moss, vermiculite, and perlite. Peat moss holds moisture well, while vermiculite and perlite provide aeration and prevent compaction, promoting strong root development.
When mixing your seed-starting blend, aim for a ratio of 1 part peat moss, 1 part vermiculite, and 1 part perlite. This combination creates a light, well-draining medium that supports sage seed germination and early growth. Make sure the mix is thoroughly combined to distribute the components evenly.
Watering frequency is key to successful seed starting. Your seed-starting mix should be moist but not waterlogged. Check the moisture level regularly by gently pressing the mix with your fingers. Adjust your watering schedule accordingly to maintain consistent moisture levels.
Temperature control is another essential factor in seed starting. Keep your seed trays in a warm location with temperatures around 70-75°F (21-24°C). Consider using a seedling heat mat to provide consistent warmth for best germination.
Planting the Sage Seeds
Prepare your seed trays by filling them with the seed-starting mix you have created following the recommended ratio of peat moss, vermiculite, and perlite. Make sure the mix is moist but not waterlogged before planting the sage seeds. Take each tiny sage seed and gently press it into the soil, about a quarter of an inch deep. Space the seeds evenly in the tray to provide ample room for germination and seedling growth.
To promote successful germination, cover the trays with plastic wrap or a humidity dome to create a greenhouse effect. This helps maintain moisture levels and warmth, two essential factors for sage seed germination. Place the trays in a warm spot with indirect sunlight, ensuring the soil remains consistently moist but not soggy. Patience is key during this stage, as germination can take anywhere from 1 to 3 weeks.
Once the sage seeds have sprouted and seedlings begin to grow, it's time to think about transplanting techniques. When the seedlings have developed their first set of true leaves, carefully transplant them into individual pots filled with well-draining soil. Handle the delicate seedlings with care to avoid damaging their roots. Provide proper care by watering them gently and ensuring they receive adequate sunlight. Following these germination and transplanting techniques will help your sage seeds thrive and grow into healthy plants.
Providing Adequate Sunlight
Position your sage seedlings in a location that receives at least 6-8 hours of sunlight daily to secure their healthy growth and development. Sunlight exposure is vital for sage plants as they thrive best in bright, sunny conditions. Placing your seedlings in a spot where they can soak up the sun's rays will help them establish strong roots and grow vigorously.
When considering sunlight exposure for your sage seedlings, it's important to understand their growth patterns. Sage plants are classified as sun-loving herbs, meaning they require ample sunlight to flourish. Insufficient sunlight can lead to leggy, weak plants that struggle to produce the flavorful leaves that sage is known for.
To guarantee your sage seedlings receive adequate sunlight, choose a sunny location for them to grow. This could be a spot in your garden that gets direct sunlight for most of the day or a sunny windowsill if you're growing them indoors. Keep an eye on the movement of the sun throughout the day to make sure your seedlings are getting the necessary amount of sunlight.
Watering the Sage Seedlings
When caring for your sage seedlings, make sure that you water them appropriately to support their growth and development. Soil moisture plays a critical role in the health of your sage plants. It's important to keep the soil consistently moist but not waterlogged. Check the moisture level regularly by sticking your finger into the soil up to the first knuckle. If it feels dry, it's time to water your sage seedlings.
Proper watering is important for root development in your sage seedlings. The roots need a consistent supply of moisture to grow strong and healthy. When watering, aim to keep the soil evenly moist to encourage the roots to spread out and establish themselves. Avoid overwatering, as this can lead to root rot and other issues. A good practice is to water your sage seedlings in the morning to allow any excess moisture to evaporate during the day.
To ensure your sage seedlings thrive, water them gently at the base to avoid disturbing the delicate roots. A watering can with a fine spout is ideal for this task. Remember, consistency is key when it comes to watering your sage seedlings. By providing the right amount of moisture, you'll set the foundation for healthy growth and robust sage plants.
Fertilizing the Young Plants
For best growth of your young sage plants, make sure they receive the necessary nutrients by fertilizing them appropriately. Soil nutrients play a vital role in the development of your sage seedlings at different growth stages. When your sage plants are still young, it's important to provide them with the right balance of nutrients to support their growth.
During the initial growth stages, young sage plants benefit from a balanced fertilizer that contains equal parts of nitrogen, phosphorus, and potassium. Nitrogen aids in the development of lush, green foliage, phosphorus promotes strong root growth, and potassium helps with overall plant health. Applying a fertilizer with these essential nutrients will ensure your sage seedlings have a solid foundation for growth.
As your sage plants continue to mature, you can adjust the fertilizer application to meet their changing needs. Consider shifting to a fertilizer higher in phosphorus to support flowering and fruiting as your sage plants reach later growth stages. Always follow the instructions on the fertilizer packaging to avoid over-fertilizing, which can harm your young sage plants.
Transplanting the Sage Seedlings
For successful growth, transfer your sage seedlings into larger containers or your garden bed once they've outgrown their current pots. Proper spacing is essential when transplanting sage seedlings. Make sure to leave at least 12 to 24 inches between each plant to allow for proper air circulation and sunlight exposure. This spacing will also prevent overcrowding as the sage plants mature.
When transplanting your sage seedlings, make sure the soil quality is ideal. Choose a well-draining potting mix or garden soil with good fertility. Avoid compacted or waterlogged soil, as this can lead to root rot and poor growth. Mix in some compost to enrich the soil and provide essential nutrients for the young plants.
Transplant your sage seedlings carefully, making sure you disturb the roots as little as possible. Gently loosen the roots from the potting container before placing them in the new, larger pot or directly in the garden bed. Water the transplanted seedlings thoroughly to help them settle into their new environment.
Remember to water your transplanted sage seedlings regularly, keeping the soil consistently moist but not waterlogged. Monitor their growth and adjust watering as needed. With proper spacing and good soil quality, your sage plants will thrive and provide you with a bountiful harvest of aromatic leaves for culinary use.
Pruning and Shaping the Plants
To maintain healthy growth and shape your sage plants effectively, regular pruning is essential. Proper pruning not only helps your sage plants look tidy and attractive but also encourages new growth and improves air circulation, reducing the risk of diseases.
When pruning your sage plants, make sure to use clean and sharp pruning shears to make precise cuts. Begin by removing any dead, damaged, or diseased branches by cutting them back to the nearest healthy growth node. This will promote the growth of new, healthy branches.
In addition to proper pruning, mastering shaping techniques can help you achieve the desired appearance for your sage plants. Shaping techniques involve selectively pruning branches to control the overall size and form of the plant. You can encourage a bushier growth by pinching off the tips of the branches or promote a more compact shape by trimming back longer stems. Experiment with different shaping techniques to find the style that best suits your preferences.
Remember to prune and shape your sage plants regularly throughout the growing season to maintain their health and appearance. By incorporating proper pruning and shaping techniques into your gardening routine, you can enjoy flourishing sage plants that not only enhance your garden but also provide you with a fresh supply of aromatic leaves.
Harvesting Fresh Sage Leaves
Maintain the vibrancy and flavor of your sage plants by harvesting fresh leaves at the peak of their aromatic potency. When harvesting sage, opt for the early morning hours when the essential oils are at their highest concentration. Gently pluck the leaves, ensuring not to strip the plant entirely, which could hinder regrowth.
To preserve the flavors of your freshly harvested sage leaves, consider drying techniques. Hang small bunches of sage leaves upside down in a dark, well-ventilated area to dry. Once dried, store the leaves in an airtight container in a cool, dry place to maintain their potency for culinary use.
Sage is a versatile herb with a myriad of culinary uses. Add freshly chopped sage leaves to butter sauces for pasta, roast them with root vegetables, or infuse them into olive oil for a flavorful drizzle. Additionally, sage pairs well with poultry dishes, making it a perfect addition to roasted chicken or turkey recipes. Experiment with sage in stuffing, soups, and even cocktails for a unique twist on classic flavors.
Troubleshooting Common Issues
When encountering problems with your sage plants, identifying common issues and their solutions is important for maintaining their health and vitality. Pest control is essential in keeping your sage plants thriving. Common pests that may affect sage include aphids, spider mites, and whiteflies. To combat these pests, you can use insecticidal soap or neem oil. Regularly inspecting your plants for any signs of pest infestation and taking prompt action can help prevent severe damage.
Disease prevention is another key aspect of maintaining healthy sage plants. Powdery mildew and root rot are common diseases that can impact sage. To prevent powdery mildew, ensure good air circulation around your plants by spacing them appropriately. Avoid overhead watering, as moisture on the leaves can promote the growth of this fungal disease. For root rot prevention, make sure your sage plants are in well-draining soil and avoid overwatering.
In addition to pest control and disease prevention, proper care practices such as providing adequate sunlight, watering consistently but not excessively, and avoiding overcrowding can also help prevent common issues with your sage plants. By staying vigilant and addressing problems promptly, you can enjoy a bountiful harvest of fresh sage leaves for culinary and medicinal purposes.
Frequently Asked Questions
Can Sage Seeds Be Planted Directly in the Ground Instead of Starting Them Indoors?
Yes, you can plant sage seeds directly in the ground. Direct planting offers benefits like less transplant shock and root disturbance. While success rates vary between outdoor and indoor planting, many find success with outdoor planting due to natural conditions.
How Long Does It Typically Take for Sage Seeds to Germinate?
Sage seeds typically germinate in 7-21 days. Keep soil consistently moist but not waterlogged. Ideal temperature for germination is around 65-70°F. Remember to water regularly and provide warmth for successful seed germination.
Are There Any Specific Pests or Diseases That Commonly Affect Sage Plants?
To maintain the health of your sage plants, keep an eye out for pests like aphids and diseases such as powdery mildew. Regularly examine your plants, employ natural remedies like neem oil for pest management, and guarantee proper airflow to prevent diseases.
Can Sage Plants Be Grown in Containers or Do They Need to Be Planted in the Ground?
You can definitely grow sage plants in containers! Just make sure they receive enough sunlight, at least 6-8 hours per day. Container gardening allows you to control the soil quality and placement, making it a convenient option.
How Often Should Sage Plants Be Repotted or Divided to Promote Healthy Growth?
To foster healthy growth, repot or divide sage plants every 2-3 years. Make sure they receive enough sunlight exposure and water them when the top inch of soil is dry. Fertilize with a balanced formula and maintain a slightly acidic soil pH.
Conclusion
Growing sage from seeds is a rewarding experience that can be easily achieved with the right guidance. By selecting the right seeds, providing adequate sunlight and water, and properly caring for your seedlings, you can enjoy a bountiful harvest of fresh sage leaves.
Remember to transplant your seedlings, prune and shape your plants, and harvest your sage leaves for culinary use. With these simple steps, you can successfully grow sage from seeds in your own garden.


