To begin planting turnip seeds as a beginner, start by selecting varieties that suit your climate and gardening goals. Make sure to prepare the planting area by clearing debris, using well-draining soil rich in organic matter, and planting seeds at the correct depth and spacing. Whether you're sowing seeds indoors or directly in the garden, it's crucial to provide sufficient sunlight, water, and nutrients for best growth. Additionally, remember to monitor for pests and diseases, harvest turnips when they reach the right size, and store them properly for future use. Mastering these basics sets you on the right path for a successful turnip growing journey full of learning and rewards.
Key Takeaways
- Choose turnip seed varieties suitable for your climate and gardening goals.
- Prepare well-draining soil rich in nutrients for optimal growth.
- Sow seeds indoors or directly in the garden after last frost.
- Provide adequate sunlight, water, and spacing for healthy turnip plants.
- Harvest turnips when 2-3 inches in diameter for best flavor and texture.
Selecting the Right Turnip Seeds
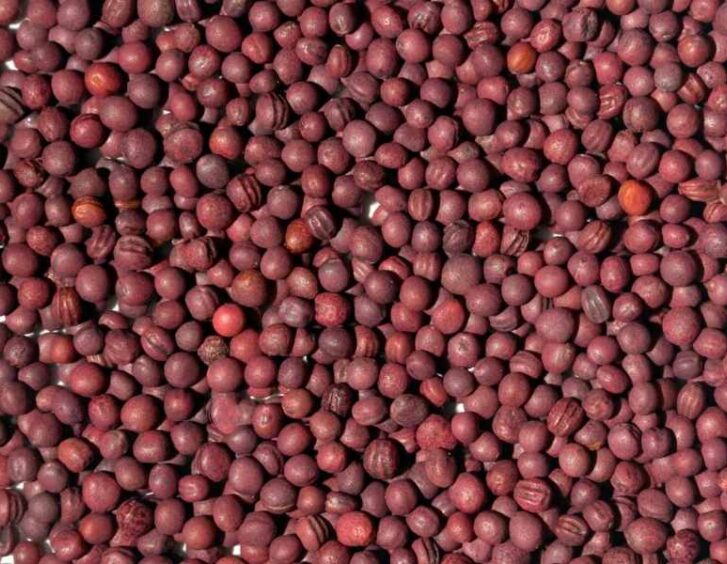
When choosing the right turnip seeds, always select varieties that are well-suited to your climate and gardening goals. Consider the seedling care and germination tips that each type requires. Some turnip varieties may need more attention during the early stages of growth, while others are more resilient. Understanding the specific needs of the seeds you choose will help you provide the best care for your plants.
Additionally, soil preparation plays a vital role in the success of your turnip crop. Different turnip varieties have varying nutrient requirements, so it's important to make sure that your soil provides the necessary elements for healthy growth. Conduct a soil test to determine if any amendments are needed to optimize the soil conditions for your selected turnip seeds. Nutrient-rich soil will promote strong root development and robust leaf growth, leading to a bountiful harvest.
Preparing the Planting Area
To begin preparing the planting area for your turnip seeds, clear any debris and weeds from the soil. This step is essential to make sure that your turnip seeds have the best environment to grow in.
Once the area is clear, it's time to focus on soil preparation. Turnips prefer well-draining soil that's rich in organic matter. You can enhance the soil quality by mixing in compost or aged manure before planting. This will provide your turnip seeds with the nutrients they need to thrive.
When it comes to planting depth, turnip seeds should be sown about half an inch deep into the soil. Make sure to space the seeds about 1 inch apart to give them enough room to grow. You can either sow the seeds directly into the ground or start them indoors and transplant them later. If you choose to sow them outdoors, make sure that the soil temperature is around 45-85°F for the best germination.
Sowing Turnip Seeds Indoors
For a head start on your turnip planting, consider sowing turnip seeds indoors to ensure a successful germination process. Indoor gardening can provide a controlled environment for your turnip seeds, ensuring they've the warmth and moisture needed to sprout. To begin, fill seedling trays with a quality seed starting mix, then plant your turnip seeds about half an inch deep in each cell. Make sure to water the soil gently after planting to keep it moist but not waterlogged.
As your turnip seeds germinate and grow into seedlings, it's important to provide them with adequate care. Place the trays in a sunny spot or under grow lights for about 14-16 hours a day to simulate natural sunlight. Keep the soil consistently moist by watering gently as needed, being careful not to drown the delicate seedlings. Once your turnip seedlings have developed their first true leaves, you can begin fertilizing them lightly to support healthy growth.
When your turnip seedlings have grown large enough, typically with a couple of sets of true leaves, they'll be ready for transplanting outdoors. Harden off your seedlings by gradually exposing them to outdoor conditions before planting them in your garden. With these indoor sowing tips and proper seedling care, you'll soon be enjoying a bountiful turnip harvest in your garden.
Direct Sowing in the Garden
Consider preparing your garden bed by loosening the soil and removing any weeds before directly sowing your turnip seeds. Soil preparation is vital for the success of your turnip crop. Turnips thrive in well-draining soil with a pH level between 6.0 and 7.5. You can enhance the soil quality by adding compost or aged manure before planting.
When it comes to timing for planting turnip seeds directly in your garden, it's important to wait until after the last frost date in your area. Turnips are cool-season vegetables that prefer temperatures between 50-75°F (10-24°C). Planting too early when the soil is still too cold can lead to poor germination. Aim to sow your turnip seeds in early spring for a bountiful harvest.
Before planting, make sure that the soil is moist but not waterlogged. You can create rows using a rake or by making shallow furrows with your hands. Sow the turnip seeds about half an inch deep and one inch apart. Once planted, gently press down the soil to ensure good seed-to-soil contact.
Watering and Sunlight Requirements
Guarantee that your turnip seeds receive sufficient sunlight and regular watering to encourage healthy growth and development. Turnips thrive in full sun, so make sure they get at least 6-8 hours of direct sunlight daily. If your garden has partial shade, choose a spot where they can still receive a fair amount of sunlight throughout the day. Adequate sunlight is essential for the process of photosynthesis, where plants convert light energy into food for growth.
When it comes to watering, maintain consistently moist soil for your turnip seeds. Water them deeply once or twice a week, making sure the soil is damp but not waterlogged. Adjust the frequency based on weather conditions; during hot and dry periods, you may need to water more often. Remember, turnip seeds require consistent moisture to germinate and establish strong roots.
In terms of soil preparation, ensure your soil is well-draining, loose, and rich in organic matter. Mulching around the plants can help retain moisture and suppress weeds. Consider companion planting with carrots, radishes, or peas to enhance growth and deter pests naturally. Additionally, practice crop rotation yearly to prevent diseases and maintain soil fertility. By following these guidelines, you can provide the most favorable conditions for your turnip seeds to flourish.
Thinning Out Seedlings
To guarantee ideal growth and spacing, thinning out seedlings is a pivotal step in fostering healthy turnip plants. Proper seedling care involves ensuring each plant has enough space to develop fully. When seedlings are too close together, they compete for nutrients, water, and sunlight, which can result in stunted growth and poor yields. Thinning techniques involve carefully removing excess seedlings to create ample room for the remaining plants to thrive.
One of the key benefits of thinning out seedlings is that it allows the remaining plants to have adequate space to spread their roots and grow without interference. By spacing out the plants appropriately, you give them the best chance to access the necessary resources for strong and healthy development. This practice also helps in preventing overcrowding, which can lead to diseases and pest infestations due to poor air circulation.
When thinning out seedlings, it's essential to choose the strongest and healthiest plants to keep. Look for seedlings with vibrant color, sturdy stems, and well-developed leaves. Remove the weaker seedlings by gently pulling them out to avoid damaging the roots of the remaining plants. By thinning out seedlings effectively, you set the stage for robust turnip plants that will yield a bountiful harvest.
Fertilizing Turnip Plants
For optimal growth and nutrient uptake, regularly nourish your turnip plants with a balanced fertilizer. When it comes to fertilizing your turnip plants, organic fertilizers are an excellent choice. These fertilizers are derived from natural sources and provide essential nutrients to support the healthy growth of your turnips. They not only nourish your plants but also contribute to improving soil health over time.
Organic fertilizers such as compost, manure, or fish emulsion are rich in nutrients that are slowly released into the soil, guaranteeing a steady supply for your turnip plants. By using organic fertilizers, you not only feed your plants but also promote a thriving ecosystem in your garden. These fertilizers enhance soil structure, increase microbial activity, and improve water retention, creating a conducive environment for your turnips to flourish.
When fertilizing your turnip plants, consider the overall health of your soil. Before applying any fertilizers, it's beneficial to test your soil to determine its nutrient levels. This will help you tailor your fertilizer application to meet the specific needs of your turnip plants. By maintaining good soil health through proper fertilization, you can guarantee that your turnips receive the necessary nutrients for robust growth and development.
Managing Pests and Diseases
When dealing with pests and diseases in your turnip plants, vigilance is crucial to maintaining their health and productivity. Keep a close eye on your plants, checking for any signs of trouble like holes in leaves, discoloration, or wilting. By catching issues early on, you can prevent them from spreading and causing significant damage to your crop.
To combat pests and diseases in a more natural way, you can consider using homemade remedies like garlic spray or neem oil. These natural solutions can help deter pests and reduce the risk of diseases without introducing harmful chemicals to your garden. Additionally, planting companion plants like marigolds can help repel pests and attract beneficial insects that prey on harmful ones.
If the infestation or disease becomes severe and natural remedies aren't effective, you may need to resort to chemical treatments. When using chemical pesticides or fungicides, always follow the instructions carefully to safeguard the health of your plants, yourself, and the environment. Remember to wear protective gear like gloves and a mask when applying these treatments and avoid using them excessively to prevent harming beneficial insects and pollinators in your garden.
Harvesting Turnips
Keep an eye out for the perfect time to harvest your turnips, ensuring they're at their peak freshness and flavor. Turnips are ready to be harvested when they've reached about 2-3 inches in diameter, which is usually around 5-8 weeks after planting the seeds. You can gently pull them out of the ground, making sure to loosen the soil around them to prevent damage. Freshly harvested turnips have a crisp texture and a sweet, peppery taste that's perfect for incorporating into your favorite dishes.
Once you have harvested your turnips, it's crucial to know how to store them properly. For short-term storage, you can keep them in the refrigerator in a perforated plastic bag for up to a few weeks. If you want to store them for a more extended period, consider blanching and freezing them. This will help preserve their flavor and nutritional value for several months.
When it comes to using your freshly harvested turnips, the possibilities are endless. Turnips can be roasted, mashed, added to soups and stews, or even pickled for a tangy twist. They can also be grated and used in salads or slaws for a crunchy texture. Experiment with different turnip recipes to discover your favorite way to enjoy this versatile vegetable.
Storing and Using Turnip Harvest
Proper storage and creative culinary applications are essential for making the most of your freshly harvested turnips. After harvesting your turnips, it's important to store them correctly to maintain their freshness and flavor. Turnips can be stored in the refrigerator for up to two weeks in a perforated plastic bag to keep them moist. For longer storage, consider preserving them through pickling or canning methods. This way, you can enjoy your homegrown turnips throughout the year.
When it comes to using your turnip harvest, the culinary possibilities are endless. Turnips are versatile root vegetables that can be used in various dishes, from soups and stews to salads and side dishes. Their slightly peppery and sweet flavor adds depth to recipes. You can explore turnip recipes such as roasted turnips with honey, turnip and potato gratin, or even turnip fries for a healthier alternative to regular fries.
In addition to their culinary uses, turnips offer various nutritional benefits. They're low in calories but rich in vitamins K, A, and C. Turnips also contain minerals like calcium and potassium, making them a healthy addition to your diet. By incorporating turnips into your meals, you not only enjoy their delicious taste but also boost your overall health. So, get creative in the kitchen and make the most of your turnip harvest!
Frequently Asked Questions
Can Turnip Seeds Be Saved and Used for Planting in Future Seasons?
Yes, you can save turnip seeds for future planting. The seed viability might decrease over time, but proper storage and seed saving techniques can help maintain their quality. Make sure to store them in a cool, dry place.
How Long Do Turnip Plants Typically Take to Mature From Seed to Harvest?
Turnip growth rates vary, but typically take 30-60 days to mature from seed to harvest. To guarantee a successful harvest, monitor soil moisture and employ proper fertilization techniques. Remember, patience is key.
Are There Any Companion Plants That Should Be Avoided When Planting Turnips?
When planting turnips, avoid companion plants like potatoes, as they might compete for nutrients. Opt for interplanting with crops like peas or beans for mutual benefits. Consider soil preparation by ensuring it's well-drained and rich in organic matter.
Can Turnips Be Grown in Containers or Raised Beds?
Yes, turnips can be grown in containers or raised beds. For container gardening, choose a deep pot and guarantee proper soil preparation. This method allows you to control the soil quality and protect your turnips from pests.
What Is the Best Way to Store Leftover Turnip Seeds for Future Use?
To store leftover turnip seeds for future use, keep them in a cool, dry place away from sunlight and humidity. Airtight containers or resealable bags work well. Label them and they can last for several years if stored properly.
Conclusion
Now that you've learned the basics of planting turnip seeds, you're ready to get your hands dirty and start your own turnip garden.
Remember to select the right seeds, prepare the planting area properly, and provide the necessary care for your turnip plants.
With a little bit of effort and patience, you'll soon be enjoying fresh, homegrown turnips straight from your own garden.
Happy planting!

