Starting seeds on a budget is totally doable! One great tip is to save seeds from your own garden to use for planting. Another savvy move is to pay attention to seedling spacing to make the most of your seeds. And let's not forget about maximizing germination rates - it's key to getting your plants off to a strong start.
When it comes to containers, think outside the box! You can reuse items like yogurt cups or cardboard tubes instead of buying new pots. Plus, making your own seed starting mix is a game-changer. Just mix peat moss, vermiculite, and perlite together, and you're good to go. Don't forget a seedling-specific fertilizer to give your plants the nutrients they need without breaking the bank.
Proper care is crucial for seedlings, so be sure to place them in a sunny spot with plenty of indirect sunlight. Aim for 12-16 hours a day to keep them happy and healthy. By following these budget-friendly tips, you'll set yourself up for seed-starting success. And as you dive deeper into gardening, you'll discover even more clever tricks to level up your green thumb game.
Key Takeaways
• Harvest seeds from existing gardens to reduce seed costs and develop a deeper connection with nurtured plants.
• Repurpose containers like yogurt cups or cardboard tubes to reduce waste and get creative with seed starting.
• Create a homemade seed starting mix with peat moss, vermiculite, and perlite to save money and control ingredient quality.
• Provide natural light for seedling growth by placing them in sunny spots or using LED grow lights or fluorescent lamps.
• Optimize watering techniques, harden off seedlings, and implement pest management to ensure healthy seedling growth.
Cutting Costs With Seed Selection
By harvesting seeds from your existing garden, you can slash your seed-starting expenses and still enjoy a diverse crop selection. This cost-effective approach allows you to control seedling spacing, ensuring ideal growth and minimizing waste.
To maximize germination rates, research the specific soil moisture and temperature requirements for each seed variety. By understanding these needs, you can create a perfect environment for your seeds to thrive.
With a little planning and attention to detail, you can successfully start seeds on a budget. By doing so, you'll not only save money but also develop a deeper connection to the plants you're nurturing.
Repurposing Containers for Seedlings
You can breathe new life into items you'd normally toss, like empty yogurt cups or cardboard tubes, by repurposing them as mini greenhouses for your seeds. Upcycling containers is an eco-friendly way to reduce waste and get creative with seed starting.
Simply clean and disinfect the containers, add a drainage hole, and fill with a seed starting mix. Plant your seeds, and place the containers in a warm spot. As your seedlings grow, provide proper care by ensuring adequate light, water, and nutrients.
Homemade Seed Starting Mix
What's the secret to creating a high-quality seed starting mix that won't break the bank?
You can make your own DIY seedling mix using cost-effective ingredients. Start by combining peat moss, vermiculite, and perlite in a 2:1:1 ratio. Then, add a small amount of fertilizer specifically formulated for seedlings. Mix everything well and moisten it with water.
This homemade mix will provide your seeds with the perfect environment to germinate and grow. By making your own seed starting mix, you'll save money and have complete control over the quality of the ingredients. Plus, it's a great way to reduce waste and get creative in the garden.
With this DIY seedling mix, you'll be on your way to growing healthy, thriving seedlings without breaking the bank.
Natural Light for Seedling Growth
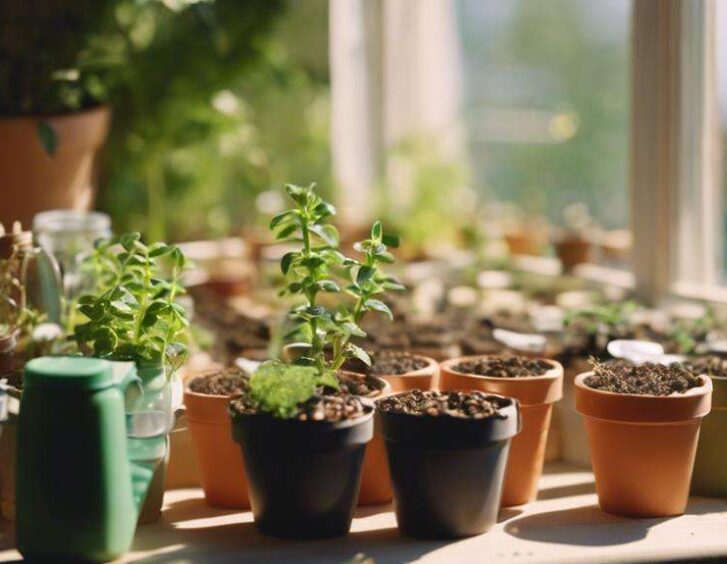
To give your seedlings the best chance of thriving, place them in a spot that receives plenty of natural light, like a sunny windowsill or under a skylight. Most seedlings require 12-16 hours of indirect sunlight daily.
Essential placement is vital, as direct sunlight can scorch tender leaves. If natural light is limited, consider indoor lighting options like LED grow lights or fluorescent lamps as supplemental sources. These can provide the necessary light spectrum and intensity for healthy growth.
Efficient Seed Starting Strategies
How can you streamline your seed starting process to maximize efficiency and minimize waste? By implementing efficient strategies, you can reduce waste and guarantee healthy seedlings. Here are some tips to get you started:
- Optimize watering techniques: Water seedlings gently but thoroughly, avoiding overwatering that can lead to root rot.
- Harden off seedlings: Gradually expose seedlings to outdoor conditions to prevent shock during transplantation.
- Implement pest management: Inspect seedlings regularly for signs of pests and take action promptly to prevent infestations.
- Plan for seedling transplantation: Prepare seedlings for outdoor conditions by gradually introducing them to direct sunlight and wind.
- Monitor seedling growth: Keep a close eye on seedling development, adjusting care and environment as needed.
Importance of Timing in Seed Starting
You've fine-tuned your seed starting process to maximize efficiency and minimize waste, but now it's time to focus on the timing of your seed starting endeavors, as the success of your seedlings relies heavily on starting them at the right moment.
One common mistake is starting seeds too early, which can lead to weak and leggy seedlings. Instead, time your seed starting to coincide with the last frost date in your area. This guarantees seedlings are strong and ready for outdoor transplanting.
Proper timing also allows for seamless seedling acclimation, reducing shock and promoting healthy growth. Remember to pot up your seedlings at the right time, maximizing their growth and giving them the best chance to thrive.
Essential Care for Seedlings
As you nurture your seedlings, keep in mind that consistent moisture, adequate light, and proper air circulation are crucial for their growth and development.
To guarantee your seedlings thrive, follow these essential care tips:
- Provide consistent moisture, but avoid overwatering, which can lead to root rot.
- Ensure sufficient light, but avoid direct sunlight, which can cause scorching.
- Maintain proper air circulation to prevent fungal diseases.
- Monitor temperature, keeping it between 65-75°F (18-24°C) for best growth.
- Gradually acclimate your seedlings to outdoor conditions to prevent shock.
Flower Varieties for Shade Gardens
When it comes to adding color and vibrancy to your shade garden, consider incorporating flowers like impatiens, coleus, or begonias, which thrive in low-light conditions. These flower varieties not only bring beauty to your garden but also attract wildlife, making your outdoor space a haven for nature lovers.
Perennial favorites like hostas, ferns, and astilbe are excellent choices for shade gardens, providing year-round interest and requiring minimal maintenance. By incorporating these flowers into your shade garden, you'll create a serene oasis that invites relaxation and connection with nature.
With a little creativity, your shaded areas can become a stunning focal point in your garden, teeming with life and color.
Benefits of Cover Cropping Explained
By incorporating cover crops into your gardening routine, you're not only reducing weed pressure and improving soil fertility but also creating a healthier, more resilient garden ecosystem. This approach benefits your garden in numerous ways:
- Improves soil health by increasing organic matter and microbial activity
- Enhances weed control by competing with unwanted plants for resources
- Attracts beneficial insects and pollinators to your garden
- Increases biodiversity and supports ecosystem services
- Reduces soil erosion and runoff, keeping your garden intact
Raspberry Cultivation Essentials
You'll want to choose a raspberry variety that fits your taste preferences, climate, and available space, considering factors like berry color, ripening time, and hardiness zones. Raspberry variety selection is essential for a successful harvest.
Prepare your soil by mixing in organic matter like compost or manure to create a fertile environment. Pruning techniques, such as removing dead canes and shaping the plant, promote healthy growth and fruit production.
Regularly inspect your plants for signs of pests like aphids or spider mites, and take action promptly to prevent infestations. Effective pest management guarantees a bountiful harvest.
Frequently Asked Questions
How Often Should I Water My Seedlings to Prevent Overwatering?
You're wondering how often to water your seedlings to prevent overwatering. Check the moisture levels by sticking your finger into the soil up to the first knuckle. If the soil feels dry, it's time to water.
Establish a water cycle where you water every 2-3 days, depending on the temperature and humidity. Monitor your seedlings' response and adjust the frequency accordingly.
What Are the Ideal Temperature Ranges for Different Seed Varieties?
When starting seeds, you'll want to know the ideal temperature ranges for different seed varieties. For instance, warm-season seeds like tomatoes and peppers thrive in temperatures between 75°F to 85°F (24°C to 30°C).
Cool-season seeds like broccoli and kale prefer temperatures between 60°F to 70°F (16°C to 21°C).
Research the specific temperature zones for your seed type to guarantee optimal germination and growth.
Can I Use LED Grow Lights Instead of Natural Window Light?
You're wondering if you can use LED grow lights instead of natural window light for your seedlings. The answer is yes! LED grow lights offer a specific light spectrum tailored to plant growth, promoting healthy development.
They're also energy-efficient, using less power than traditional lighting. Plus, they provide consistent light, reducing the risk of uneven growth.
Just make sure you choose an LED grow light with a suitable spectrum and intensity for your seedlings' specific needs.
How Do I Prevent Pests From Infesting My Indoor Seedlings?
To prevent pests from infesting your indoor seedlings, you'll want to focus on two key areas: pest repellents and soil sanitation.
Start by using natural pest repellents like neem oil or garlic sprays to deter pests.
Next, guarantee your soil is sanitized by pasteurizing it in the oven or using a sterilized potting mix.
Regularly inspect your seedlings for signs of pests and take action quickly if you spot any issues.
Can I Start Seeds in a Greenhouse or Cold Frame in Early Spring?
You're wondering if you can start seeds in a greenhouse or cold frame in early spring. The answer is yes! These structures provide a microclimate, allowing for season extension and a head start on the growing season.

