You can easily cultivate vibrant celandine poppies in your garden by understanding their unique characteristics and providing them with the right growing conditions. These herbaceous perennials thrive in shady spots with minimal direct sunlight and consistently moist, well-drained soil. To get started, gather seeds in summer, subject them to cold stratification, and transplant carefully. Maintain a consistent watering schedule, fertilize sparingly, and deadhead flowers to encourage more blooms. With proper care, you'll be rewarded with bright yellow flowers in early spring. Now, discover the secrets to creating a thriving celandine poppy garden that attracts pollinators and adds vibrancy to your outdoor space.
Key Takeaways
• Provide Celandine Poppies with shady spots and minimal direct sunlight for optimal growth.
• Ensure consistently moist, well-drained soil with a neutral to slightly acidic pH for thriving plants.
• Fertilize sparingly and deadhead flowers to encourage more blooms and maintain a vibrant display.
• Mulch around the base to retain moisture and regulate soil temperature for healthy growth.
• Divide mature clumps or sow seeds in spring or fall for successful propagation and establishment.
Understanding Celandine Poppy Characteristics
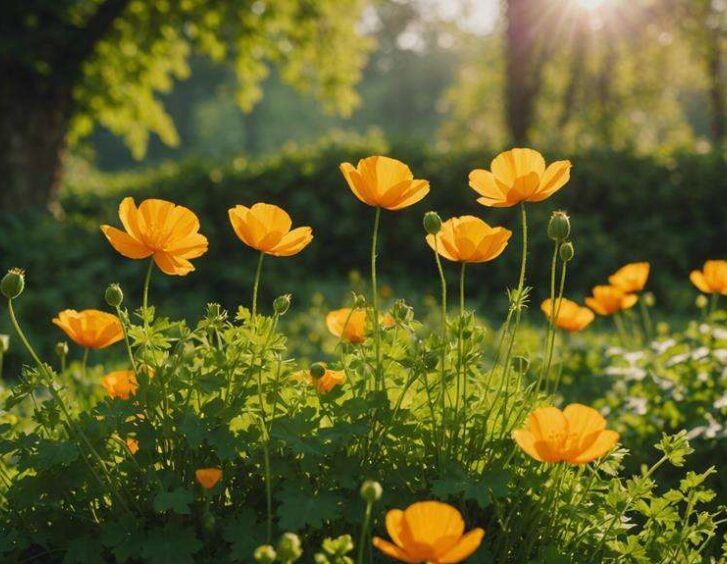
You'll recognize celandine poppies by their deeply cut, wavy-edged leaves that resemble geranium leaves, and their bright yellow flowers with four petals that bloom in early spring. As a herbaceous perennial, they belong to the Papaveraceae family and Stylophorum genus. Native to Eastern North America, these plants thrive in shady spots with minimal direct sunlight.
Their stems are bristly, with fuzzy seed pods that attract pollinators and form showy displays. The tiny, shiny black seeds are stored in split-open pods, awaiting dispersal. With proper care, celandine poppies can grow up to 1.0-1.5 feet tall, making them a lovely addition to native plant gardens, pollinator gardens, or rain gardens.
Propagating and Transplanting Tips
To successfully propagate celandine poppies, gather seeds in summer, and then subject them to cold, moist stratification to increase germination rates.
You can also divide mature clumps into individual crowns with roots in early spring or fall. When transplanting, dig a hole larger than the roots, and water well after planting. Keep the soil consistently moist until the seedlings develop several true leaves.
Wear gardening gloves and use a shovel or trowel to make the process easier. Add organic mulch to retain soil moisture and reduce transplant shock. With proper care, your celandine poppies will thrive and provide a vibrant display of bright yellow flowers in early spring.
Ideal Growing Conditions Explained
Cultivating celandine poppies requires a thoughtful approach to their growing conditions. They thrive in shady spots with minimal direct sunlight and consistently moist, well-drained soil. You'll want to choose a location that receives indirect sunlight, as direct sunlight can be too intense for these delicate flowers.
When it comes to soil, make sure it's fertile and retains moisture well, but drains excess water to prevent waterlogged soil. Aim for a neutral to slightly acidic pH, and you'll be on your way to creating an ideal environment for your celandine poppies to flourish.
Soil and Climate Requirements
When considering fertile, wet soil and a neutral to slightly acidic pH, your celandine poppies will thrive in USDA hardiness zones 4-9, where the climate is cool and humid. These zones provide the perfect environment for your poppies to flourish.
You'll want to avoid areas with dry soil, as celandine poppies need consistent moisture to grow well. When it comes to climate, a cool and humid environment is ideal. This means avoiding areas with extreme temperatures or dry air.
Caring for Your Celandine Poppies
You'll want to maintain a consistent watering schedule for your celandine poppies, as they require moist soil to thrive. Make sure the soil is well-drained, as these plants don't like wet feet.
You'll also want to fertilize sparingly, as celandine poppies don't need a lot of nutrients. In fact, they'll do just fine in rich, organic soil with no added fertilizers.
Deadheading the flowers will encourage more blooms, and mulching around the base will help retain moisture.
Keep an eye out for slugs, which can be a problem, but generally, these plants are trouble-free.
With a little care, your celandine poppies will reward you with bright yellow blooms in early spring, attracting pollinators and adding a pop of color to your garden.
Designing With Celandine Poppies
When designing your garden, consider pairing celandine poppies with ferns, hostas, or other wildflowers to create a beautiful, shaded oasis. This combination will add a touch of elegance to your outdoor space.
Since celandine poppies thrive in shady spots with minimal direct sunlight, they're perfect for areas under trees or near buildings. You can also use them to add a pop of bright yellow color in early spring, creating a stunning landscape impact.
Remember to plant them in fertile, well-drained soil with a neutral to slightly acidic pH. With minimal maintenance, you'll be enjoying your vibrant celandine poppies in no time.
Companion Planting and Varieties
Cultivate a stunning shade garden by pairing celandine poppies with complementary plants that share similar growing conditions and bloom times. You can pair them with ferns, hostas, or other wildflowers that thrive in shady spots with minimal direct sunlight. This harmonious pairing will create a visually appealing landscape with a mix of textures and colors.
When selecting companion plants, choose varieties that bloom at the same time as your celandine poppies to create a vibrant display. Consider native species that are non-invasive, like the genus Stylophorum, to guarantee a balanced ecosystem.
Wildlife Value and Support
By attracting early-season pollinators with their bright yellow blooms, celandine poppies provide a valuable source of nectar and support the local ecosystem.
You'll be delighted to know that these vibrant flowers are a haven for bees, butterflies, and other pollinators, which are essential for a thriving ecosystem.
As the season progresses, the seed pods will mature, offering a nutritious snack for wildlife.
What's more, celandine poppies are deer- and rabbit-resistant, making them an excellent choice for your garden.
Troubleshooting Common Issues
Identify potential issues early on to prevent them from taking hold, as celandine poppies are generally trouble-free, but may occasionally fall prey to slugs. Keep an eye out for signs of slug damage, such as holes in leaves or stems.
To deter slugs, try copper tape barriers, crushed eggshells, or beer traps. You can also hand-pick slugs at night or use commercial traps.
If you notice fungal diseases, remove affected leaves or stems, and ensure good air circulation. Celandine poppies are relatively low-maintenance, but addressing any issues promptly is crucial for the health and vibrancy of your plants.
With a little vigilance, you'll be enjoying your thriving celandine poppies in no time.
Establishing a Thriving Celandine Poppy Garden
To establish a thriving celandine poppy garden, start by selecting a location that receives minimal direct sunlight and has fertile, wet soil with a pH between neutral and slightly acidic. This will provide the ideal conditions for your celandine poppies to flourish.
Next, prepare the soil by adding organic mulch to retain moisture and regulate soil temperature. Plant your celandine poppy seeds or divisions in the spring or fall, when the weather is cooler and rainfall is more consistent.
Water well after planting and keep the soil consistently moist during the first few weeks. With proper care, your celandine poppies will thrive and provide a vibrant display of bright yellow flowers in the early spring.
Frequently Asked Questions
Can I Grow Celandine Poppies in Containers?
You're wondering if you can grow celandine poppies in containers. The answer is yes, but with some considerations.
Since celandine poppies prefer well-drained, fertile soil and partial shade, choose a container that's at least 12 inches deep with good drainage holes. Use a rich potting mix and keep the soil consistently moist.
Also, be mindful of the plant's mature height (1-1.5 feet) when selecting a container size. With proper care, you can enjoy these beautiful blooms in a container garden.
How Often Should I Water My Celandine Poppies?
You'll want to keep your celandine poppies consistently moist, but not waterlogged. Check the soil daily, and water when the top inch feels dry to the touch.
Water thoroughly, making sure the soil is moist but not soggy. Aim for about 1-2 inches of water per week, either from rain or irrigation. Adjust based on weather conditions, and avoid getting water on the leaves to prevent fungal diseases.
Are Celandine Poppies Susceptible to Diseases?
You're wondering if celandine poppies are susceptible to diseases. Generally, these plants are trouble-free, but you should keep an eye out for slugs. They're not typically prone to diseases, but overwatering can lead to root rot.
Make sure to provide good air circulation and well-draining soil to prevent moisture-related issues. With proper care, your celandine poppies should thrive.
Can I Use Celandine Poppies as Cut Flowers?
You're wondering if you can use celandine poppies as cut flowers. While they're beautiful in bouquets, their stems are quite brittle and prone to breaking. Additionally, their pollen can stain, making them less ideal for arrangements.
If you still want to try, harvest stems in the morning when dew is present, and immediately place them in water to prevent wilting. However, keep in mind that their vase life might be shorter than other flowers.
Do Celandine Poppies Have Any Medicinal Properties?
Exploring the medicinal properties of celandine poppies is important. Historically, the plant has been used in herbal medicine to treat various ailments, including skin conditions, fever, and rheumatism.
The plant contains alkaloids, which have been shown to have anti-inflammatory and antimicrobial properties.
However, it's crucial to note that the plant can be toxic in large quantities, and its use should be approached with caution and under the guidance of a medical professional.

