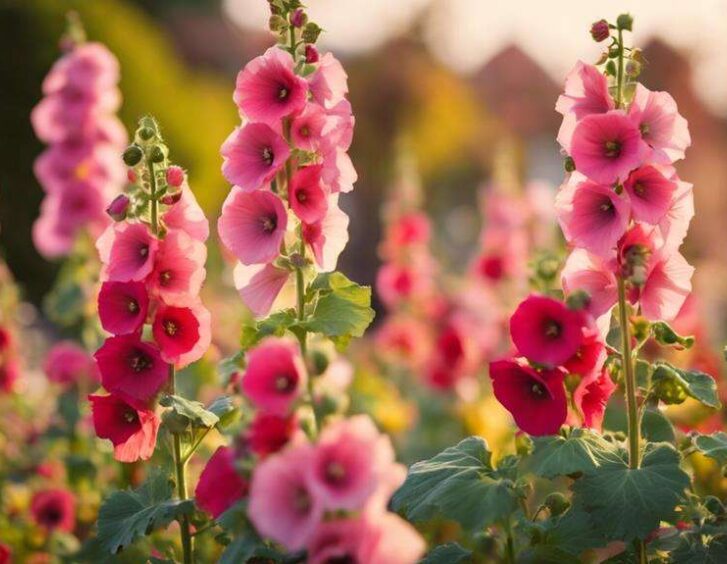
Growing hollyhocks from seeds can be a rewarding experience if you pay attention to the details.
To start, you'll need hollyhock seeds, cell trays, and seed-starting mix.
Whether you choose to sow the seeds indoors or directly outdoors, timing is key - aim for 8-10 weeks before the last spring frost.
Keeping the soil consistently moist, providing indirect sunlight, and regular fertilization are crucial for the seeds to germinate and grow into healthy seedlings.
As your hollyhocks start to sprout, remember to ensure they have enough airflow, receive adequate light, and are kept at mild temperatures.
It's also important to gradually introduce the seedlings to outdoor conditions to avoid shocking them during transplantation.
With the right care, your hollyhocks will flourish, and soon enough, you'll be able to enjoy their stunning blooms in your garden.
Don't forget to tailor your care routine based on their specific needs for the best results.
Key Takeaways
• Gather essential supplies, including hollyhock seeds, cell trays, and seed-starting mix, to ensure successful germination.
• Sow seeds indoors 8-10 weeks before the last spring frost, maintaining a temperature of 60-70°F (15-21°C) for healthy growth.
• Provide indirect sunlight and consistent moisture, watering from the bottom to prevent displacement and ensure even distribution.
• Harden off seedlings safely by gradually acclimating them to outdoor conditions over 10 days to prevent transplant shock.
• Fertilize seedlings regularly to promote healthy growth and stunning blooms.
Gather Essential Supplies
Gather hollyhock seeds, cell trays, an optional heat mat, seed-starting mix, and labels to guarantee a successful start. You'll need these essential supplies to grow stunning hollyhocks from seed. Proper seedling care is vital, so make sure you're prepared.
As you begin, consider your planting techniques, including sowing seeds indoors or directly outdoors. Remember to follow watering tips, such as providing consistent moisture, especially during germination. A fertilizing schedule will also promote healthy growth. Feed your hollyhocks with compost or liquid fertilizer in the spring, and cease feeding once flowering starts.
With the right supplies and care, you'll be on your way to growing beautiful, thriving hollyhocks.
Sow Seeds Indoors Successfully
Start seeds indoors 8-10 weeks before the last spring frost to give them a head start on the growing season. This allows you to control the environment and provide ideal seedling care.
Maintain an indoor temperature of 60-70°F (15-21°C) for healthy growth. Once sprouted, provide indirect sunlight exposure to promote strong stems. Water from the bottom to prevent displacement and guarantee even moisture distribution.
Use a seed-starting mix and labels to keep track of your progress. By following these steps, you'll be well on your way to successfully sowing seeds indoors and giving your hollyhocks the best possible start in life.
Sow Seeds Outdoors Directly
When you're ready to skip the indoor sowing process, you can directly sow hollyhock seeds outdoors in the spring or fall, giving them a chance to germinate and grow in their permanent location.
Before sowing, prepare the soil by loosening it to a depth of about 12 inches. Add organic matter like compost to improve soil structure and fertility.
Create a watering schedule to keep the soil consistently moist during the germination period. Use germination techniques like soaking the seeds in water for 24 hours to enhance germination rates.
Keep an eye out for pests like slugs and snails, and use natural pest control methods like copper tape to deter them.
Grow Healthy Seedlings On
You'll want to keep your seedlings consistently moist, but not waterlogged, to promote healthy growth and development. Proper seedling care is vital at this stage.
Water from the bottom to prevent displacement, and make sure the soil isn't too wet or dry.
Provide adequate airflow to prevent fungal diseases. Maintain a mild temperature between 60-70°F (15-21°C) for best growth.
Indoor lighting is essential; make sure your seedlings receive sufficient light, but avoid direct sunlight, which can cause overheating.
Keep the temperature consistent, and consider using a heating mat if necessary.
Harden Off Seedlings Safely
After nurturing your seedlings indoors, it's time to acclimate them to outdoor conditions, a process that requires careful planning to prevent transplant shock. You'll want to harden off your seedlings safely to guarantee a smooth shift.
Start by moving them to a shaded outdoor area for a few hours a day, gradually increasing their outdoor exposure over the next 10 days. This gradual acclimation will help prevent transplant shock.
As you harden off your seedlings, make sure they receive indirect sunlight exposure, gradually increasing their time in direct sunlight.
Transplant With Proper Spacing
Your hollyhock seedlings are now ready to be transplanted into larger containers or directly into the garden. It's crucial to provide them with proper spacing to promote healthy growth and development. When transplanting, make sure each seedling has at least two sets of true leaves and space them 12-18 inches apart to prevent overcrowding. This allows for adequate air circulation and sunlight penetration.
Consider the root depth of your hollyhocks, as they can grow quite deep, and provide enough space for their roots to spread out. Remember to choose a location with full sun exposure and well-draining soil, as hollyhocks thrive in such conditions. By giving your seedlings the right space and environment, you'll be rewarded with stunning, towering blooms.
Meet Soil and Sun Needs
Hollyhocks thrive in well-draining soil and require full sun exposure to produce their signature tall, stately blooms. You'll want to make sure your hollyhocks receive at least six hours of direct sunlight per day.
As for soil, aim for a mix that drains excess water quickly, as hollyhocks don't like wet feet.
Here are some key considerations for meeting your hollyhocks' soil and sun needs:
- Soil quality: Choose a well-draining mix to prevent waterlogged soil.
- Sunlight exposure: Provide at least six hours of direct sunlight per day.
- Drainage: Ensure your soil drains excess water quickly to prevent root rot.
- Sun requirements: Hollyhocks need full sun to produce robust blooms.
Provide Support for Tall Plants
To prevent their statuesque stems from toppling over in the wind, you'll need to provide sturdy support for your hollyhocks as they grow.
Since these towering beauties can reach 5-8 feet in height, stake placement is essential for structural support. Consider vertical gardening to maximize space utilization and keep your garden organized.
Place stakes near the base of the plant, gently tying the stem to the stake with soft twine or cloth strips. This will prevent damage to the plant while keeping it upright.
As your hollyhocks grow, adjust the stakes accordingly to make sure they remain secure.
With proper support, your hollyhocks will thrive, providing a stunning display of colorful blooms for you to enjoy.
Water and Fertilize Correctly
Consistently providing your hollyhocks with the right amount of water and nutrients is crucial for their growth and blooming. You want to guarantee they receive the right amount of moisture and nutrients to thrive.
Here are some tips to keep in mind:
- Water your hollyhocks regularly, but avoid overhead watering to prevent fungal diseases.
- Feed your hollyhocks with compost or liquid fertilizer in the spring when new growth emerges.
- Cease feeding once flowering starts to promote blooming.
- Effective watering and fertilizing will encourage healthy growth and promote blooming.
Mulch and Prune for Success
After ensuring your hollyhocks receive the right amount of water and nutrients, it's time to focus on protecting and maintaining their health through mulching and pruning.
Mulching benefits your plants by reducing rust spore infection risk and protecting seedlings from frosts. You can mulch young seedlings in spring to prevent disease and frost damage.
When it comes to pruning, prune stems after flowering to prevent self-seeding and encourage new growth. Pruning tips include cutting back stems to the ground after flowering, and pruning dead or damaged leaves to maintain a clean look.
Frequently Asked Questions
Can I Grow Hollyhocks in Containers or Pots?
You can definitely grow hollyhocks in containers or pots! Choose a pot that's at least 12-18 inches deep with drainage holes to prevent waterlogged soil.
Use a well-draining soil mix specifically designed for containers. Feed your hollyhocks with a balanced fertilizer, and make sure the pot size is large enough to accommodate the mature plant's height.
With proper care, you'll be enjoying stunning blooms in no time!
How Do I Prevent Rust Disease in My Hollyhock Plants?
To prevent rust disease in your hollyhock plants, you'll want to focus on a few key areas.
First, establish good air circulation around your plants to reduce humidity.
Next, maintain good soil sanitation by removing any debris or infected plants.
Moisture management is also vital, so avoid overhead watering and instead water at soil level.
Finally, consider applying fungicides as a preventative measure.
Are Hollyhocks Deer-Resistant or Do They Attract Pests?
You're wondering if hollyhocks attract pests or are deer-resistant.
The truth is, hollyhocks can attract deer, especially if they're hungry and other food sources are scarce. As for pest control, hollyhocks can be susceptible to pests like Japanese beetles and spider mites.
To minimize the risk, maintain good garden hygiene, remove weeds, and use organic pest control methods whenever possible.
Can I Divide and Replant Established Hollyhock Clumps?
You're wondering if you can divide and replant established hollyhock clumps. The answer is yes!
To do this, carefully dig up the clump, gently separating the roots.
Prune the roots to stimulate new growth, making sure each division has at least one 'eye' or crown.
Replant the divisions in well-draining soil, watering thoroughly.
This process, called clump division, allows you to propagate new hollyhocks and keep your garden thriving.
Do Hollyhocks Require Deadheading to Promote More Blooms?
You're wondering if deadheading hollyhocks promotes more blooms. The short answer is yes!
Hollyhocks naturally drop their petals after blooming, a process called petal drop. Deadheading, or removing spent flowers, encourages the plant to focus energy on producing new blooms, extending the bloom duration.
Simply snip off the wilted flowers, and you'll be rewarded with more vibrant blooms. By deadheading, you'll enjoy a longer blooming period and a more stunning display.

