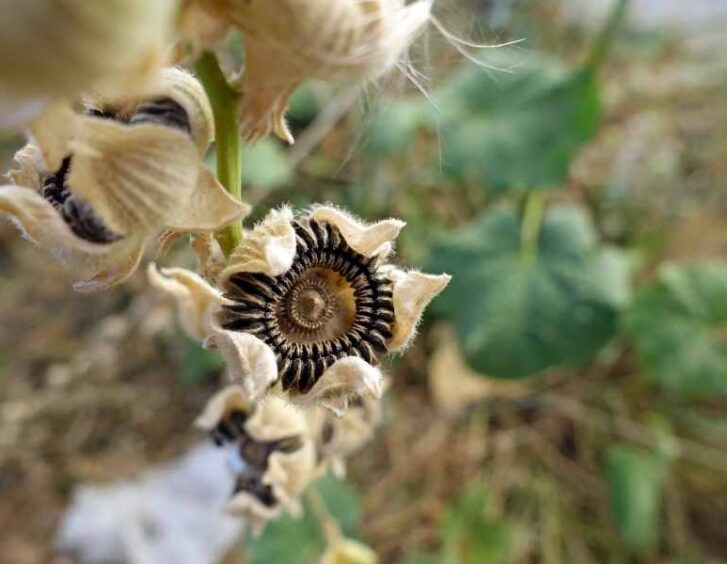
To cultivate stunning hollyhocks from seeds, start by selecting seeds that match your climate and storing them properly in a cool, dry place. When planting, choose a sunny spot with well-draining soil and space the seeds correctly while keeping the soil moist. Guarantee your seedlings receive care and consider transplanting if needed, along with providing sufficient sunlight for 6-8 hours daily. Support tall stems with staking or trellises, and enjoy the blooms by using them in arrangements and attracting pollinators like bees and butterflies. For more tips on cultivating vibrant hollyhocks, follow the detailed directions provided.
Key Takeaways
- Choose hollyhock seeds suited to your climate for optimal growth.
- Plant seeds in a sunny, well-draining location for healthy development.
- Provide sufficient sunlight, organic nutrients, and proper support for tall stems.
- Manage pests and diseases through regular assessment and care.
- Enjoy vibrant hollyhock blooms in floral arrangements and for attracting pollinators.
Selecting the Right Seeds
When choosing hollyhock seeds, pick varieties that do well in your specific climate to guarantee successful sprouting and growth. It's important to take into account the seed storage and viability to make sure you're starting with the best possible seeds.
Proper seed storage is vital for maintaining their viability. Keep your hollyhock seeds in a cool, dry place away from direct sunlight. This will help preserve their freshness and increase the chances of successful sprouting when you're ready to plant them.
Seed viability refers to the ability of a seed to sprout and grow into a healthy plant. When selecting hollyhock seeds, go for those that are known for their high viability rates. This will give you a head start in the growing process and increase the likelihood of a successful garden. Check the seed packet for information on viability to make an informed decision.
Preparing the Planting Area
To properly prepare the planting area for your hollyhocks, assess the soil quality and choose a well-drained spot with ample sunlight. Evaluating the soil is important before planting your hollyhock seeds. Hollyhocks prefer rich, well-draining soil, so check if your soil is sandy, loamy, or clay-like. Sandy soil drains quickly but may need more frequent watering, while clay soil retains water and may require amending for better drainage. Loamy soil, a mix of sand, silt, and clay, is ideal for hollyhocks as it provides good drainage and nutrient retention.
Improving drainage is vital for the success of your hollyhocks. If your soil doesn't drain well, consider amending it by adding organic matter like compost or peat moss. This helps loosen the soil, allowing water to flow through more easily. Raised beds can also improve drainage by preventing waterlogging. Make sure the planting area has good airflow to reduce the risk of diseases that thrive in damp conditions.
Choose a sunny spot for your hollyhocks as they love sunlight. Select an area that receives at least 6-8 hours of sunlight per day for vibrant, healthy plants. By preparing the planting area properly, you set the foundation for your hollyhocks to thrive and bloom beautifully.
Sowing the Hollyhock Seeds
Prepare your hollyhock seeds for sowing by following these simple steps. Start by choosing a location that receives plenty of sunlight and has well-draining soil. Hollyhocks thrive in rich, fertile soil, so consider adding compost or organic matter to enhance the soil quality. Confirm the soil is loose and free of debris before planting your seeds.
When sowing the hollyhock seeds, keep in mind that they prefer to be directly sown into the ground. You can start by making shallow furrows in the soil using a small garden trowel. Place the seeds about 18 inches apart to give them enough space to grow. Cover the seeds lightly with soil and gently pat them down to ensure good soil-to-seed contact.
Water the newly planted seeds gently to avoid displacing them. Keep the soil consistently moist but not waterlogged. Germination usually takes around 14-21 days, so be patient and continue to provide the seeds with proper care during this time.
Once the hollyhock seeds have sprouted and grown into seedlings, you can start thinking about seedling care and transplanting tips. When the seedlings have developed a few true leaves, you can thin them out to ensure they've ample space to grow. Stay tuned for the next steps on providing adequate watering for your hollyhocks!
Providing Adequate Watering
After sowing the hollyhock seeds, maintaining proper hydration by watering consistently is essential for their growth and development. Watering frequency is key to guaranteeing the soil moisture remains adequate for the hollyhocks to thrive. Depending on the weather conditions, you may need to water your hollyhocks every 2-3 days, especially during hot and dry spells.
To make watering easier and more efficient, consider using drip irrigation systems. These systems deliver water directly to the soil around the plants, reducing water waste and making sure that the roots receive sufficient moisture. Alternatively, a simple watering can also works well for hollyhocks. Just make sure that the water reaches the base of the plant without wetting the leaves excessively, as hollyhocks are prone to fungal diseases if their foliage remains consistently damp.
Check the soil moisture regularly by inserting your finger into the soil near the hollyhocks. If the top inch of soil feels dry, it's time to water. Remember, consistency is key when it comes to watering hollyhocks. By providing them with the right amount of water, you'll support healthy growth and vibrant blooms that will beautify your garden and create a welcoming environment for all to enjoy.
Ensuring Sufficient Sunlight
Ensuring your hollyhocks receive sufficient sunlight daily is essential for their healthy growth and vibrant blooming. To maximize growth and create ideal conditions for your hollyhocks, you should place them in an area that receives at least 6-8 hours of direct sunlight per day. Sunlight is vital for the process of photosynthesis, where plants convert light energy into food, enabling them to grow and bloom beautifully.
When selecting a spot for your hollyhocks, choose a location that offers ample sunlight and where they won't be shaded by nearby structures or trees. South-facing areas usually receive the most sunlight throughout the day, making them an excellent choice for planting your hollyhocks. By ensuring they receive the right amount of sunlight, you're providing them with the energy they need to thrive.
If you notice your hollyhocks aren't blooming as vibrantly as expected, inadequate sunlight could be the culprit. In such cases, consider moving them to a sunnier spot to enhance their growth and flowering potential. Remember, sunlight is like fuel for your hollyhocks, so by giving them the ideal conditions, you're setting them up for success in showcasing their stunning blooms.
Fertilizing the Seedlings
To support the healthy growth of your hollyhock seedlings, consider fertilizing them appropriately. Providing your seedlings with the right nutrients is vital for their development. Organic nutrients are a great option for feeding your hollyhock seedlings. These organic fertilizers are derived from natural sources like compost, manure, or bone meal. They provide a slow and steady release of essential nutrients, promoting strong and vigorous growth without the risk of burning the delicate seedlings.
Slow-release fertilizers are another excellent choice for nourishing your hollyhock seedlings. These fertilizers gradually release nutrients over an extended period, ensuring a continuous supply of food for your plants. They're convenient to use and reduce the risk of over-fertilization, which can harm the seedlings. When choosing a slow-release fertilizer, look for products specifically formulated for seedlings to meet their unique nutritional needs.
Remember to follow the instructions on the fertilizer packaging to avoid overfeeding your seedlings. Over-fertilizing can lead to nutrient imbalances and stunted growth. By providing your hollyhock seedlings with the right organic nutrients and slow-release fertilizers, you're giving them the best chance to thrive and bloom beautifully in your garden.
Thinning Out Seedlings
Consider evaluating your hollyhock seedlings to determine which ones require thinning out for best growth. Proper seedling care is important for healthy hollyhocks, and part of this care involves thinning out the seedlings at the right time. As your seedlings progress through their growth stages, it's vital to make sure they've adequate spacing to thrive.
When your hollyhock seedlings have developed their first true leaves, usually after the initial set of cotyledon leaves, it's time to assess which seedlings to thin out. Look for the strongest and healthiest seedlings, with vibrant green leaves and sturdy stems. These are the ones that should be retained for best growth.
Thinning out seedlings involves gently removing the weaker ones, leaving only a certain number of plants per spacing recommendations. Overcrowding can lead to competition for nutrients, water, and sunlight, hindering the growth of all the seedlings. By thinning them out, you allow the remaining plants to have ample space to spread their roots and grow vigorously.
Managing Pests and Diseases
Start by identifying common pests and diseases that may impact your hollyhocks during their growth. Pest management is crucial to guarantee your hollyhocks thrive. Keep an eye out for aphids, which are small insects that can extract the sap from your plants, causing them to weaken. You can manage aphids by spraying your hollyhocks with a strong stream of water or using insecticidal soap.
Another common pest is the hollyhock weevil, which feeds on the leaves and flowers of hollyhocks. To control hollyhock weevils, you can handpick them off your plants or use neem oil as a natural insecticide. Additionally, watch out for diseases like powdery mildew, which appears as a white powdery substance on the leaves. Disease prevention is key to maintaining your hollyhocks healthy. Ensure good air circulation around your plants by spacing them properly and avoid overhead watering, which can promote the growth of mildew.
Regularly inspect your hollyhocks for any signs of pests or diseases, and take action promptly to prevent further damage. By practicing good pest management and disease prevention, you can help your hollyhocks grow strong and stunning.
Supporting Tall Stems
Guarantee your hollyhocks' tall stems stay upright and strong by providing proper support as they grow. Hollyhocks are known for their towering heights, and supporting them is essential for preventing them from bending or breaking under their own weight. Staking techniques are commonly used to help keep your hollyhocks standing tall and proud in your garden.
When selecting a staking method, consider using bamboo stakes or metal rods that are tall enough to support the full height of your hollyhocks. Place the stakes in the ground near the base of each plant, being careful not to damage the roots. As your hollyhocks grow, gently tie the stems to the stakes using soft garden twine. This will provide additional support and prevent the stems from swaying in the wind.
Vertical gardening is another effective way to support tall hollyhocks. Installing a trellis or vertical frame near your hollyhocks can help guide their growth upwards. As the hollyhocks reach towards the sun, they'll naturally lean against the trellis for support. This method not only keeps your hollyhocks upright but also adds a visually appealing element to your garden.
Enjoying the Blooms
To fully appreciate the beauty of your hollyhocks, take a moment to marvel at the vibrant blooms adorning their tall stems. The colorful flowers not only add a touch of elegance to your garden but also attract pollinators like bees and butterflies, enhancing the biodiversity of your outdoor space.
When your hollyhocks are in full bloom, consider creating stunning floral arrangements to decorate your home. Cut a few blossoms with long stems and arrange them in a vase to brighten up your living room or dining table. The tall spikes of hollyhock flowers can make a striking centerpiece that will surely catch the eye of anyone who enters your home.
Additionally, hollyhocks are perfect for pollinator gardens. These beautiful flowers provide nectar and pollen for bees, butterflies, and other beneficial insects, helping to support these essential pollinators. By planting hollyhocks in your garden, you not only enjoy their gorgeous blooms but also contribute to the health of the local ecosystem.
Frequently Asked Questions
How Long Does It Typically Take for Hollyhock Seeds to Germinate?
Typically, hollyhock seeds take around 14 to 21 days to germinate. To help expedite the process, guarantee consistent watering and maintain a temperature of around 65-75°F. Plant them in well-draining soil with full sunlight exposure.
Can Hollyhocks Be Grown in Containers or Do They Require a Traditional Garden Bed?
You can definitely grow hollyhocks in containers, offering flexibility and space-saving solutions. Guarantee a well-draining soil mix rich in organic matter. This method allows you to enjoy these beautiful flowers even if you don't have a traditional garden bed.
Are There Any Specific Companion Plants That Can Help Promote the Growth of Hollyhocks?
When it comes to companion planting for hollyhocks, consider options like foxglove or lavender to enhance growth. They can provide shade and support, while marigolds might deter pests. Remember, each plant has its unique benefits and drawbacks.
Do Hollyhocks Require Any Special Care During the Winter Months?
During the winter months, hollyhocks need additional care to safeguard them from frost damage. Provide winter protection by mulching around the base and covering with a layer of straw. This will help guarantee their survival until spring.
Can Hollyhocks Be Propagated Through Methods Other Than Seeds, Such as Division or Cuttings?
To propagate hollyhocks through division, separate the root clumps in the spring. For cuttings propagation, take stem cuttings from healthy plants. Place them in soil, keep moist, and watch them grow into new beautiful hollyhocks.
Conclusion
To wrap up, cultivating stunning hollyhocks from seeds is a rewarding and enjoyable process. By following the steps outlined in this article, you can successfully grow these beautiful flowers in your garden.
Remember to:
- Select the right seeds
- Prepare the planting area properly
- Provide adequate water and sunlight
- Manage pests and diseases
- Support tall stems
With patience and care, you'll soon be able to enjoy the vibrant blooms of your hollyhocks. Happy gardening!

