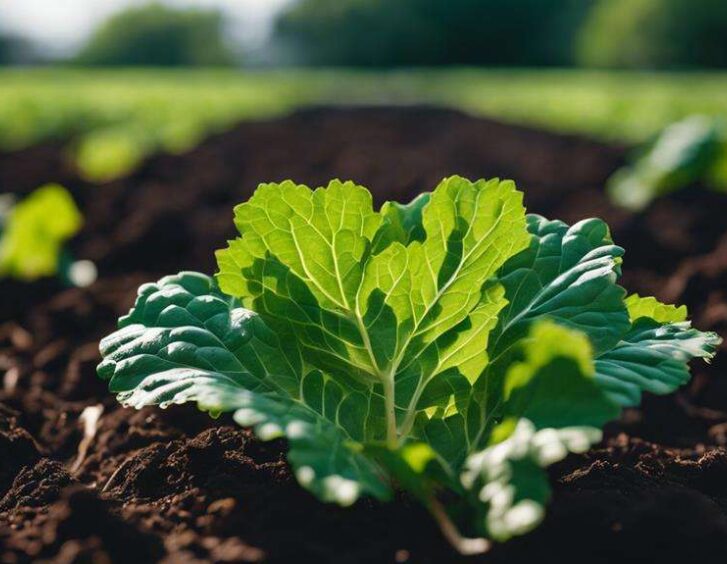
If you want to grow celeriac successfully, here's a tip: start by planting your seeds indoors about 10-12 weeks before the last frost. This way, you give them a head start in warm and moist soil, which is perfect for their germination.
Once your seedlings are ready, make sure to transplant them after they've toughened up a bit. When you plant them in the ground, remember to space them about 6-8 inches apart. It's also important to choose soil that drains well and has a pH level between 6.5-7.5. This will create the ideal environment for your celeriac to thrive and grow into delicious, nutritious roots.
To keep your celeriac happy, give it plenty of sunlight, regular watering, and a balanced fertilizer. Think of it as giving your plants a well-rounded diet to help them reach their full potential. Additionally, consider using slow-release fertilizer to provide a steady supply of nutrients over time.
Good air circulation is another key factor in promoting strong root development, so make sure your plants have room to breathe. By following these simple steps, you'll be well on your way to enjoying a bountiful harvest of celeriac that you can savor in all your favorite dishes. And who knows, you might even uncover some new flavor combinations along the way!
Key Takeaways
• Start seeds indoors 10-12 weeks before the last frost, and transplant seedlings after hardening off to ensure a successful start.
• Provide ideal growing conditions, including warm temperatures, well-draining soil, adequate sunlight, and proper moisture for optimal growth.
• Water consistently, avoiding waterlogged soil, and mulch to retain moisture, while adjusting watering during hot, dry periods for healthy root development.
• Fertilize with a balanced fertilizer at planting and during active growth, and consider side-dressing with compost mid-season for added nutrients.
• Monitor for common pests and diseases, using organic control methods, crop rotation, and good garden hygiene to maintain a healthy crop.
Celeriac Basics and History
When you explore the world of celeriac, it's important to understand that this knobby root vegetable boasts a subtle nutty flavor, resembling celery and parsley, but is primarily grown for its bulbous root.
You'll discover that celeriac is a treasure trove of culinary uses, packed with nutritional benefits. Rich in vitamins, minerals, and antioxidants, it's a great addition to soups, stews, and salads.
Historically, celeriac originated in the Mediterranean and was first cultivated in ancient Egypt. It was later documented as a food plant in France in the 1600s, becoming an integral part of cultural traditions.
As you explore the world of celeriac, you'll uncover its significance in various cuisines and its potential to elevate your cooking.
Planting and Propagating Celeriac
To give your celeriac the best start, sow seeds indoors 10-12 weeks before the last frost date, as this root vegetable takes up to 120 days to mature. You'll want to provide ideal conditions for seed germination, ensuring the soil is warm and moist.
Indoor cultivation allows you to control the environment, which is essential for celeriac's sensitive nature. Sow seeds in cell trays, and keep the soil consistently moist but not waterlogged. Once seedlings emerge, provide indirect light and maintain a temperature between 65-75°F (18-24°C).
As your plants grow, you'll be one step closer to enjoying the delicious, nutty flavor of homegrown celeriac.
Ideal Growing Conditions
You'll need to provide celeriac with a location that receives at least six hours of direct sunlight daily, as it thrives in mildly warm temperatures throughout its growth. This will foster healthy root development and promote best growth.
To guarantee your celeriac plants thrive, consider the following ideal growing conditions:
- Warm temperatures: Aim for a consistent temperature range of 60-70°F (16-21°C) for best growth.
- Well-draining soil: Celeriac prefers fertile, loamy soil with a pH between 6.0-7.0 to support robust root development.
- Adequate sunlight exposure: Ensure your plants receive direct sunlight for at least six hours daily to promote healthy growth.
- Proper soil moisture: Maintain consistent moisture levels to support root growth and prevent water stress.
- Ideal air circulation: Ensure good air circulation around your plants to prevent disease and promote healthy growth.
Watering and Fertilizing
Maintaining a regular watering schedule is essential for celeriac, especially during its rapid growth phase, to support healthy root development. You'll want to water your celeriac plants 3-4 times a week during dry summer months, avoiding sogginess. This consistent moisture will promote nutrient absorption, ensuring your roots grow strong and healthy.
When it comes to fertilizing, remember that celeriac is a heavy feeder. Apply an all-purpose slow-release fertilizer to provide your plants with the necessary nutrients for best growth.
Effective irrigation techniques, such as soaker hoses or drip irrigation, can help deliver water directly to the roots, reducing evaporation and runoff.
Harvesting and Storing Celeriac
Timing is essential when harvesting celeriac, as the roots are ready to be unearthed when they're at least 3-5 inches in diameter, a milestone that usually occurs around 120 days after sowing. You'll know it's time to harvest when the tops of the plants begin to yellow and fall over. Carefully dig around the roots with a fork, being careful not to damage them.
Here are some tips to keep in mind:
- Store harvested roots in a refrigerator at 33-38°F (1-3°C) for 6-8 months.
- Use preservation techniques like pickling or fermenting to enjoy your celeriac year-round.
- Try roasting or mashing your celeriac for a delicious side dish.
- Experiment with recipes that incorporate celeriac, such as soups or salads.
- Consider sharing your harvested celeriac with friends and family, or trading with other gardeners.
Managing Pests and Diseases
In order to protect your celeriac crop from damage, knowing about the common pests and diseases that can affect it's essential.
You'll want to keep an eye out for pests like aphids, slugs, and carrot rust flies, as well as diseases like root-knot nematode and celery leaf spot.
To combat these issues, consider using natural remedies like neem oil or introducing beneficial insects to your garden.
You can also opt for pest-resistant varieties or disease-resistant strains of celeriac.
In some cases, chemical treatments may be necessary, but be sure to follow instructions carefully to avoid harming your crop.
Soil and Temperature Requirements
Your celeriac crop will thrive in fertile, loamy soil with a pH between 6.0 and 7.0, and ideal temperatures ranging from 60-70°F (16-21°C) throughout its growth. Proper soil preparation and temperature regulation are essential for a successful harvest.
Here are some key considerations to keep in mind:
- Soil preparation: Loamy soil with good drainage and aeration supports healthy root development.
- Temperature regulation: Avoid extreme temperatures, as they can lead to stunted growth or bolting.
- Soil pH: Maintain a slightly acidic to neutral soil pH to promote nutrient uptake.
- Moisture levels: Consistent moisture levels prevent roots from becoming waterlogged or dry.
- Seasonal considerations: Adjust soil temperature and moisture levels according to the season to optimize growth.
Sowing Seeds and Acclimation
Starting celeriac seeds indoors 10-12 weeks before the last frost date sets them up for success, giving them a head start on the growing season. This allows for best seed germination and development before outdoor transplanting.
You'll want to sow seeds in cell trays, about 1/8 inch deep, and keep the soil consistently moist. Once seedlings have 2-3 sets of leaves, it's time to start acclimating them to outdoor conditions. Begin by moving the seedlings to a shaded area outdoors for a few hours a day, gradually increasing their exposure to direct sunlight and outdoor temperatures.
This process helps prevent shock and ensures a smooth progression to outdoor transplanting. By following these steps, you'll be well on your way to growing healthy, thriving celeriac plants.
Supporting Healthy Growth
You'll need to provide your celeriac plants with the right growing conditions to support healthy growth and development. Focus on promoting strong root development, as this will determine the size and quality of your harvest.
Make sure to provide your plants with adequate nutritional needs, including essential micronutrients and macronutrients.
Here are some key factors to keep in mind:
- Soil quality: Celeriac thrives in fertile, loamy soil with a pH between 6.0-7.0.
- Watering: Consistent moisture promotes healthy root growth, but avoid waterlogged soil.
- Temperature: Maintain a temperature range of 60-70°F (16-21°C) for best growth.
- Sunlight: Provide at least 6 hours of direct sunlight daily for healthy leaf development.
- Fertilization: Use a slow-release fertilizer to meet your celeriac plants' nutritional needs.
Common Challenges and Solutions
As you nurture your celeriac plants, be prepared to tackle common challenges that can hinder their growth, from pests and diseases to nutrient deficiencies and environment-related issues.
You'll need to stay vigilant and take proactive measures to prevent infestations and infections. For pest control, use row fabric to shield plants from carrot rust flies and other pests. Implement disease prevention strategies like crop rotation and using disease-free seeds.
Keep an eye out for signs of nutrient deficiencies, such as yellowing leaves, and adjust your fertilizer application accordingly. By being proactive and addressing these challenges head-on, you'll be well on your way to growing healthy, thriving celeriac plants.
Frequently Asked Questions
Can I Grow Celeriac in Containers?
You can grow celeriac in containers, but make sure to choose a large enough one, at least 12-18 inches deep and 18-24 inches wide.
Use a well-draining soil mix specifically designed for containers, with a pH between 6.0-7.0. This will provide your celeriac with the right conditions to thrive.
Just remember to water consistently and provide enough sunlight, and you'll be enjoying your homegrown celeriac in no time!
How Often Should I Rotate Celeriac Crops?
When planning your celeriac crop rotation, you'll want to rotate every 2-3 years to maintain soil health. This helps prevent pests and diseases from building up in the soil.
Make a crop plan to rotate celeriac with other non-root vegetables to keep the soil balanced. This rotation will guarantee your celeriac grows strong and healthy, and you'll avoid depleting the soil of essential nutrients.
Will Celeriac Grow in Partial Shade?
You're wondering if celeriac will thrive in partial shade. The answer is yes, but with some limitations.
While celeriac can tolerate partial shade, it still requires at least 6 hours of direct sunlight daily for best growth. If you can provide this amount of sunlight, your celeriac will do well.
However, if your area receives less sunlight, you may need to adjust your expectations or consider a different location for your crop.
Can I Save Celeriac Seeds for Next Year's Crop?
You're wondering if you can save celeriac seeds for next year's crop. The answer is yes, but with some important considerations.
Make sure to harvest seeds from mature, healthy plants, and dry them thoroughly to preserve seed viability. Proper storage in a cool, dry place will help maintain their quality.
Timing is essential - harvest seeds when the plants are fully mature, usually around 120 days after sowing. With proper care, your saved seeds should remain viable for next year's crop.
Do I Need to Peel Celeriac Before Using It?
You're wondering if you need to peel celeriac before using it. The answer is, it's up to you! Peeling can help remove any rough or bitter skin, but it's not necessary.
If you do choose to peel, use a vegetable peeler and remove any tough or bruised spots. Leaving the skin on can add fiber and nutrients to your dish.
Either way, celeriac's subtle nutty flavor will shine through in your chosen cooking method, whether it's roasting, mashing, or sautéing.


 Lalmon LLC. All rights reserved