To cultivate micro herb seeds successfully as a beginner, it is essential to start by selecting high-quality seeds from reputable suppliers. Ensure that the seeds are organic and non-GMO, and come with explicit planting instructions. Prepare a nutrient-rich growing medium with proper moisture levels and good drainage. Sow the seeds at the correct depth and spacing, avoiding overwatering and using vermiculite for moisture retention. Position the containers in warm, sunny spots for germination, providing sufficient light for growth. Maintain consistent moisture levels, increase humidity, and control temperature between 60-75°F. Fertilize every two weeks once the plants have grown, inspect for pests regularly, and ensure proper air circulation to prevent diseases.
Harvest the herbs at 2-3 inches with true leaves for the best flavor, using clean tools, and store them properly for freshness. Integrate the herbs into your dishes for flavor enhancement. Additional tips on caring for your micro herb seeds await your exploration.
Key Takeaways
- Choose quality organic, non-GMO seeds for best results.
- Plant seeds at correct depth and spacing for optimal growth.
- Maintain consistent moisture levels without overwatering.
- Provide adequate light and warmth for successful germination.
- Harvest herbs at 2-3 inches with true leaves for best flavor.
Choosing the Right Seeds
When selecting micro herb seeds, prioritize quality over quantity to guarantee successful growth. Opt for reputable seed suppliers who offer organic, non-GMO seeds to make sure of the best start for your micro herb garden. Quality seeds have a higher germination rate, leading to healthier plants that will thrive in your care.
Consider the specific herbs you want to grow and choose seeds that suit your preferences. Whether it's the fresh aroma of basil, the delicate leaves of cilantro, or the spicy kick of arugula, selecting seeds based on your favorite flavors will make your gardening experience even more rewarding. Additionally, research the ideal growing conditions for each herb to make certain they'll flourish in your chosen environment.
Look for seed packets that provide clear instructions on planting depth, spacing, and watering requirements. These details are vital for the successful growth of your micro herbs. Remember that each herb may have different needs, so following the guidelines provided to nurture your plants effectively.
Lastly, check the expiration date on the seed packets to make sure you're working with fresh seeds. Expired seeds may have a lower germination rate, leading to disappointing results. By investing in quality seeds tailored to your preferences and following proper planting instructions, you're setting the stage for a flourishing micro herb garden that will provide you with fresh flavors and a sense of accomplishment.
Preparing the Growing Medium
For successful growth of your micro herb seeds, prepare a suitable growing medium that provides the essential nutrients and support for your plants. The growing medium you choose plays an important role in the development of your micro herbs, offering a stable foundation for their roots to thrive. To start, select a high-quality potting mix or seed-starting mix that's well-draining and holds moisture effectively. These mixes are specially formulated to provide the right balance of nutrients and aeration for your seeds to germinate and grow successfully.
Before planting your micro herb seeds, make sure that the growing medium is moist but not waterlogged. You can achieve this by lightly watering the mix and allowing it to absorb the water for a few hours before planting. This step helps create a hospitable environment for your seeds to begin their growth journey.
Additionally, consider adding some organic matter, like compost or worm castings, to enrich the growing medium with additional nutrients. This extra boost can support the initial growth stages of your micro herbs and contribute to their overall health and vigor as they mature.
Planting the Seeds
To guarantee successful germination and growth of your micro herb seeds, carefully plant them at the correct depth in the prepared growing medium. Start by creating small furrows or depressions in the soil of your growing container. The depth at which you should plant the seeds depends on the type of herb you're growing, but a general rule of thumb is to plant them at a depth of about twice the size of the seed. Gently press the soil over the seeds to make sure there's good soil-to-seed contact without compacting the soil too much.
When planting the seeds, make sure to space them out evenly to allow room for growth. Crowding the seeds can lead to competition for resources and hinder their development. After planting, lightly water the soil to make certain it's moist but not waterlogged. Avoid overwatering, as this can cause the seeds to rot before they've a chance to germinate.
Covering the planted seeds with a thin layer of vermiculite or fine soil can help maintain moisture levels and protect the seeds as they germinate. Once the seeds are planted, place the growing container in a warm, sunny spot to kickstart the germination process. Now that your seeds are planted, you're one step closer to enjoying your own fresh micro herbs right at home!
Providing Adequate Light
Guarantee your micro herb seeds receive adequate light for healthy growth by placing them in a location that gets at least 6-8 hours of direct sunlight daily. Light is essential for the photosynthesis process, which allows plants to produce their food and grow. Without sufficient light, your micro herbs may become leggy or pale, impacting their flavor and nutritional value. To make sure they thrive, consider placing them near a sunny window or under grow lights if natural sunlight is limited.
When positioning your micro herb seeds, aim for a spot where they can bask in the sun's rays without being exposed to intense midday heat that can scorch delicate leaves. Rotate the containers regularly to encourage even growth, as plants tend to lean towards the light source. If you notice your herbs leaning, it's a sign they need more sunlight.
Watering and Humidity
Make sure your micro herb seeds receive proper watering and maintain ideal humidity levels to support their growth and development. Watering your micro herb seeds is vital for their growth. When watering, aim to keep the soil consistently moist but not waterlogged. Use a spray bottle or a gentle watering can to avoid disturbing the delicate seeds. A good rule of thumb is to water your micro herb seeds every 1-2 days, but adjust based on how quickly the soil dries out.
Humidity levels are also essential for the success of your micro herb seeds. Most micro herbs prefer higher humidity levels to mimic their natural environment. You can increase humidity by misting the air around your plants with a spray bottle or placing a tray of water near the plants. Monitoring the humidity levels with a hygrometer can help you make sure they stay within the ideal range.
Temperature Control
How can you ensure the temperature is optimal for the development of your micro herb seeds?
Temperature control is essential for the successful growth of your micro herbs. Aim for a consistent temperature range between 60-75°F (15-24°C) for most micro herb varieties. Fluctuations in temperature can stress the plants, impacting their growth and flavor. To maintain the ideal temperature, consider placing your micro herb containers in a location that's away from drafty windows or heating vents. This will help create a stable environment for your herbs to thrive.
During the germination phase, make sure that the temperature remains consistently warm, around 70-75°F (21-24°C), to encourage rapid seed sprouting. You can use a seedling heat mat to provide bottom heat, aiding in germination. Once your micro herbs have sprouted, you can adjust the temperature slightly lower, within the recommended range, to promote healthy growth.
In colder climates, you may need to use a small space heater or grow lights to maintain the proper temperature for your micro herb seeds. Conversely, in hot climates, you might need to provide additional shade or move the containers to a cooler spot to prevent overheating. Monitoring the temperature regularly with a thermometer will help you make necessary adjustments to create the perfect environment for your micro herb seeds to flourish.
Fertilizing Your Micro Herbs
To guarantee the healthy growth of your micro herbs, adequate fertilization is essential in supplying essential nutrients for their development. When fertilizing your micro herbs, opt for a balanced, water-soluble fertilizer with equal parts nitrogen, phosphorus, and potassium. This balance ensures your herbs receive the necessary nutrients for robust growth.
To apply the fertilizer, dilute it to half the recommended strength to prevent over-fertilization, which can harm your delicate micro herbs. Gently water the soil with the diluted fertilizer solution, making sure not to drench the plants. This process should be repeated every two weeks to support continuous growth and development.
Remember to avoid using fertilizer during the germination stage, as the young plants are sensitive to strong concentrations of nutrients. Once your micro herbs have established their growth, gradually introduce fertilizer to help them thrive. Always follow the instructions on the fertilizer packaging for the best results.
Proper fertilization plays a crucial role in the overall health and productivity of your micro herbs. By providing them with the right balance of nutrients, you're setting the foundation for a successful growing experience. Stay consistent with your fertilizing routine, and your micro herbs will reward you with vibrant growth and flavorful leaves.
Managing Pests and Diseases
Combatting pests and diseases is vital for safeguarding the health and energy of your micro herbs. As you nurture your tiny plants, it's important to keep an eye out for any unwanted invaders that might harm them. One effective way to manage pests is by regularly inspecting your micro herbs for any signs of trouble. Look for yellowing leaves, holes, or webs, as these could indicate the presence of pests like aphids, spider mites, or caterpillars.
To deal with these pesky intruders, you can gently wipe the leaves with a damp cloth to remove them physically. Another natural remedy is to create a mixture of water and mild soap to spray on the affected areas. This can help deter pests without harming your precious micro herbs.
When it comes to diseases, prevention is key. Ensure proper air circulation around your plants and avoid overwatering to prevent fungal infections. If you notice any signs of disease such as wilting or unusual spots on the leaves, act promptly. Remove any infected parts to stop the disease from spreading further.
Harvesting Your Micro Herbs
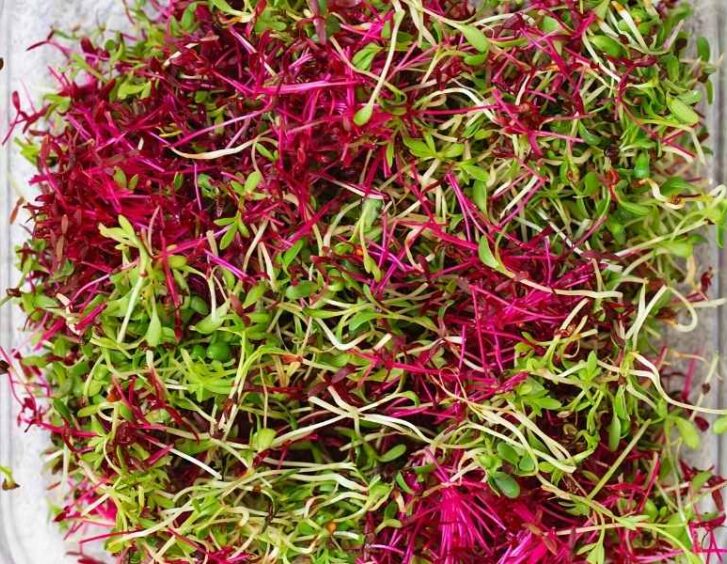
Examine your micro herbs regularly to determine the optimal time for harvesting. When your micro herbs reach about 2-3 inches in height and have developed their true leaves, they're ready to be harvested. Use clean scissors or shears to snip the herbs just above the soil level. Make sure to harvest gently to avoid damaging the delicate leaves.
Harvesting your micro herbs at the right time guarantees that you get the best flavor and nutritional value. By picking them when they're young and vibrant, you'll enjoy the freshest taste and most potent aroma. Plus, harvesting encourages the plants to continue growing, giving you a longer harvest period.
Remember, micro herbs are meant to be enjoyed fresh, so try to harvest only what you need for immediate use. This way, you can savor the full flavor and aroma of your homegrown herbs. If you do have extra, you can store them properly to enjoy later.
As you harvest your micro herbs, take a moment to appreciate the hard work you've put into growing them. Your dedication has paid off, and now you can enjoy the fruits of your labor in every delicious bite. Keep up the good work, and continue to nurture your micro herb garden for a continuous supply of fresh, flavorful herbs.
Storing and Using Your Harvest
Consider storing your harvested micro herbs properly to maintain their freshness and flavor for future use. After harvesting your micro herbs, gently wash and dry them to remove any dirt and debris. Once dry, you can store them in a few different ways to keep them fresh. One method is to wrap the herbs in a slightly damp paper towel and place them in a resealable plastic bag in the refrigerator. This helps maintain moisture levels while preventing wilting. Another option is to place the herbs in a glass of water, similar to how you'd store fresh flowers, and cover them with a plastic bag. Change the water every few days to ensure their freshness.
When it comes to using your harvested micro herbs, the possibilities are endless. Add them to salads, sandwiches, soups, or as a garnish for a pop of flavor. You can also use them in cooking by adding them to dishes right before serving to preserve their delicate taste. Experiment with different combinations to find what you enjoy most. Remember, micro herbs have a more intense flavor than their fully grown counterparts, so a little goes a long way in enhancing your dishes. Enjoy the freshness and vibrancy that homegrown micro herbs bring to your culinary creations!
Frequently Asked Questions
Can Micro Herbs Be Grown Outdoors or Do They Require an Indoor Setting?
You can cultivate micro herbs both outdoors and indoors. However, for better control over growing conditions and to safeguard them from harsh weather, indoor settings are ideal. Just make sure they receive enough light and water.
How Long Do Micro Herb Seeds Typically Take to Germinate and Grow to a Harvestable Size?
Micro herb seeds usually take 1-2 weeks to germinate indoors. Once sprouted, they can be harvested in another 2-4 weeks. Keep them near sunlight and water regularly for best results in your harvest.
Is It Possible to Grow Multiple Types of Micro Herbs Together in the Same Container?
Yes, you can absolutely grow multiple types of micro herbs together in the same container. It's a great way to save space and create a beautiful mix of flavors and colors in your herb garden.
Are There Any Specific Tools or Equipment Needed for Growing Micro Herbs, Beyond the Basic Supplies Mentioned in the Article?
To grow micro herbs successfully, you'll need additional tools like grow lights, humidity domes, and a pH meter. These tools help create the ideal environment for your herbs to thrive, ensuring they have the best chance at healthy growth.
Are There Any Common Mistakes That Beginners Make When Growing Micro Herbs That Should Be Avoided?
When growing micro herbs, avoid overwatering as it can lead to root rot. Guarantee proper drainage and sunlight exposure. Be patient and do not rush the growth process. Remember to adhere to instructions carefully for successful cultivation.
Conclusion
To sum up, growing micro herb seeds can be a rewarding and enjoyable experience for beginners. By following the steps outlined in this guide, you can successfully cultivate your own fresh and flavorful herbs at home.
Remember to choose the right seeds, provide adequate light and water, fertilize appropriately, and watch out for pests and diseases. With proper care and attention, you'll soon be harvesting and enjoying your own micro herbs in no time.
Happy growing!










 Lalmon LLC. All rights reserved