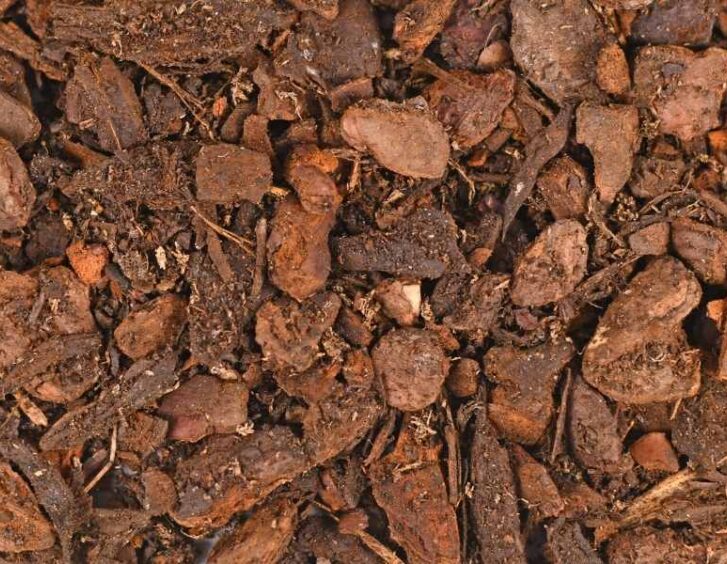
To master the creation of an ideal orchid potting mix, start by understanding the basics: orchids need a mix that supports, retains moisture, and drains well. Choose materials such as bark, sphagnum moss, perlite, and charcoal to replicate their natural habitat and prevent root rot. Guarantee the mix is well-draining, pick the right potting medium for airflow, select good drainage materials like perlite and charcoal, enhance aeration with lightweight components like coarse sand, balance moisture with water-retaining materials, adjust pH levels, mix everything thoroughly, and test texture before potting. Following these steps will help your orchids flourish in a tailored environment.
Key Takeaways
- Choose a well-draining medium like bark or perlite.
- Ensure good airflow with materials like sphagnum moss.
- Balance moisture retention with coconut coir.
- Incorporate fertilizer for essential nutrients.
- Maintain optimal pH levels between 5.5 and 6.5.
Understanding Orchid Potting Mix Basics
If you're new to orchid care, understanding the fundamentals of orchid potting mix is vital for your plant's health and growth. Orchids are delicate plants that require a special type of potting mix to thrive. The mix provides the necessary support, moisture retention, and drainage for your orchid to develop strong roots and beautiful blooms.
Orchid potting mixes are typically composed of a combination of materials such as bark, sphagnum moss, perlite, and charcoal. These components work together to replicate the orchid's natural growing environment, which is often found attached to trees in tropical regions. The mix should be well-draining to prevent waterlogged roots, as orchids are susceptible to root rot if left in standing water.
When repotting your orchid, it's essential to use a fresh potting mix to provide the plant with the nutrients it needs. Avoid using regular potting soil, as it retains too much water and can suffocate the orchid's roots. Instead, opt for a specialized orchid mix available at garden centers or create your own blend following recommended recipes.
Understanding the fundamentals of orchid potting mix will set you on the right path to caring for your orchid successfully. By providing the proper mix, you're creating an environment where your orchid can flourish and thrive, rewarding you with stunning flowers and healthy growth.
Choosing the Right Potting Medium
To choose the appropriate potting medium for your orchid, make sure to consider the specific needs of your plant's root system and growing conditions. Orchids have unique requirements when it comes to their potting mix. They typically need a well-draining medium that allows air to circulate around their roots. A common and effective orchid potting mix consists of materials like bark, sphagnum moss, perlite, and charcoal. These components help mimic the orchid's natural epiphytic growing environment.
When picking a potting medium for your orchid, make certain that it provides good aeration and drainage. Orchid roots require oxygen to thrive, so a mix that retains too much water can lead to root rot. The size of the potting medium is also essential. Larger bark or moss pieces can provide better airflow, while finer particles may compact over time, reducing aeration.
Consider the specific orchid species you're growing when selecting a potting medium. Some orchids, like Phalaenopsis, prefer a finer mix with more moisture retention, while others, such as Cattleyas, thrive in a chunkier mix that allows for rapid drainage.
Selecting Suitable Drainage Materials
When choosing suitable drainage materials for your orchid potting mix, prioritize options that promote efficient water flow and prevent waterlogging. Good drainage is essential for orchids to thrive, as they dislike having their roots sitting in water for prolonged periods. One excellent choice for promoting drainage is perlite, a lightweight volcanic rock that helps aerate the soil and prevent compaction.
Another option is coarse sand, which aids in water drainage while providing stability to the potting mix. You can also consider adding charcoal pieces to your potting mix to improve drainage and absorb any excess moisture, helping to prevent root rot. Charcoal not only enhances drainage but also helps in keeping the mix fresh by absorbing impurities and odors.
Furthermore, using materials like bark chips or sphagnum moss can also contribute to better drainage in your orchid potting mix. These organic materials allow for airflow around the roots and aid in preventing waterlogging.
Adding Enhancements for Aeration
Consider incorporating lightweight materials like perlite or coarse sand into your orchid potting mix to enhance aeration and promote healthy root growth. These enhancements help create air pockets in the soil, allowing oxygen to reach the roots more easily.
Perlite, a volcanic glass material, is excellent for improving drainage and aeration due to its lightweight nature. It prevents compaction in the soil, providing the roots with the necessary air circulation to thrive. Similarly, coarse sand is another beneficial addition that aids in increasing porosity and preventing the mix from becoming too dense.
When adding perlite or coarse sand to your orchid potting mix, aim for a ratio of around 1:1 with the other components like bark or sphagnum moss. This balanced mixture guarantees that your orchid has the right combination of aeration and moisture retention. Mixing these materials thoroughly before potting your orchid will help distribute them evenly, creating a homogeneous environment for your plant's roots to grow healthily.
Incorporating Water-Retaining Components
Enhance moisture retention in your orchid potting mix by incorporating water-absorbing materials like sphagnum moss or coconut coir. These components act like sponges, holding onto water and gradually releasing it to keep your orchid roots hydrated. When mixing your potting medium, consider adding a generous amount of sphagnum moss or coconut coir to guarantee a good balance of moisture in the soil.
Sphagnum moss is a popular choice due to its excellent water retention properties. It holds moisture well without becoming waterlogged, providing a stable environment for your orchid roots. Coconut coir, on the other hand, is a sustainable option that also retains water effectively. Both materials are natural and beneficial for your orchid's growth.
To incorporate these water-retaining components into your potting mix, simply blend them in with your chosen medium. Mix them thoroughly to make sure an even distribution throughout the soil. This will help create a consistent moisture level for your orchid to thrive.
Balancing Nutrients in the Mix
To guarantee your orchid receives sufficient nourishment, focus on balancing nutrients in the potting mix by incorporating fertilizer or organic matter. Orchids, like any living organism, need a critical diet to thrive. When preparing the potting mix, make sure it contains the necessary nutrients essential for your orchid's growth. Look for fertilizers specifically formulated for orchids, as they provide the ideal blend of nutrients to support healthy development. These fertilizers typically include a balanced ratio of nitrogen, phosphorus, and potassium, along with essential micronutrients like calcium, magnesium, and iron.
Organic matter can also be beneficial in enriching the potting mix with nutrients. Materials such as compost, well-rotted manure, or coconut coir can enhance the soil structure and provide a key source of nourishment for your orchid. When incorporating organic matter, ensure it's well-composted to avoid any risk of pests or diseases.
Balancing nutrients in the potting mix is vital for the overall health and liveliness of your orchid. Regularly monitoring the nutrient levels and adjusting the fertilization schedule accordingly will help ensure your orchid remains strong and vibrant. By paying attention to the nutrient balance in the potting mix, you're taking a proactive step towards providing the best possible care for your orchid and fostering its growth within your home.
Adjusting Ph Levels Appropriately
Maintain the pH levels of the potting mix within the essential range to support your orchid's growth and health. Orchids thrive in slightly acidic conditions, with a pH range between 5.5 and 6.5. To make sure your orchid's well-being, regularly check the pH levels of the potting mix using a pH testing kit. If the pH is too high, meaning it's too alkaline, you can lower it by incorporating acidic components such as sphagnum moss, pine bark, or peat moss into the mix. On the other hand, if the pH is too low, indicating it's too acidic, you can increase it by adding dolomite lime or crushed oyster shells.
Remember, maintaining the essential pH levels is critical as it directly affects your orchid's ability to absorb necessary nutrients. When the pH is balanced, your orchid can efficiently take up nutrients like nitrogen, phosphorus, and potassium, promoting healthy growth and vibrant blooms. By adjusting the pH levels of the potting mix appropriately, you create an environment where your orchid can thrive and flourish.
Ensuring the pH levels are within the needed range is a simple yet crucial step in caring for your orchid. By taking the time to adjust the pH levels of your potting mix, you're providing your orchid with the best possible conditions for growth, ultimately fostering a strong and healthy plant that will bring you joy for years to come.
Mixing the Components Thoroughly
To guarantee your orchid's peak health and growth, thoroughly blend the components of the potting mix following the guidance provided below. Properly mixing the components is essential to create a well-balanced environment for your orchid to thrive. Begin by gathering the ingredients: coarse fir bark, sphagnum moss, perlite, and charcoal.
First, take a clean container large enough to hold all the components. Measure out the appropriate amounts of each ingredient according to the specific requirements of your orchid species. Pour the coarse fir bark into the container, followed by the sphagnum moss, perlite, and charcoal.
Using a trowel or gloved hands, gently mix the components together. Make sure that each ingredient is evenly distributed throughout the mix. The coarse fir bark provides stability and aeration, while the sphagnum moss retains moisture. Perlite aids in drainage, and charcoal helps prevent root rot by absorbing excess moisture.
Continue blending the components until you achieve a uniform mixture. Take your time to make sure that all the ingredients are thoroughly incorporated. This step is vital in creating a potting mix that will promote healthy root growth and overall plant health. Once the components are well mixed, your potting mix is ready for potting your orchid.
Testing the Consistency and Texture
Assess the mixture's consistency and texture by feeling it with your hands for any clumps or uneven distribution of ingredients. When you run your fingers through the mix, it should feel uniform and free of large chunks. If you notice any clumps or areas where the components aren't evenly mixed, gently break them apart and continue blending until the texture is consistent throughout.
Verify that the mix is moist but not overly wet. It should hold together when you squeeze it, but not so much that water drips out. The ideal consistency is similar to that of a well-wrung sponge, providing enough moisture for your orchid's roots without causing waterlogging issues.
Check for any dry pockets within the mixture. These can indicate uneven hydration levels, which may lead to problems for your orchid. If you find dry spots, consider lightly misting the mix while mixing it further to ensure even moisture distribution.
The texture of the mix should be light and airy, allowing proper airflow to the roots. A well-blended mix will feel fluffy and slightly granular, providing the right balance of aeration and moisture retention essential for healthy orchid growth. By paying attention to these details, you set the stage for successful orchid potting that can support your plant's well-being and growth.
Potting Your Orchids With Success
Achieve successful orchid potting by following these essential steps. Start by selecting a pot that's just slightly larger than the orchid's current one. Make sure the pot has drainage holes to prevent waterlogging, which can harm your orchid. Next, prepare your potting mix by combining materials like bark, perlite, and charcoal to create a well-draining medium that mimics the orchid's natural environment.
Gently remove your orchid from its current pot, being cautious not to damage its roots. Shake off old potting mix and inspect the roots for any signs of rot or damage. If you notice any issues, trim the affected roots with sterilized scissors to promote healthy growth.
Place a layer of fresh potting mix at the bottom of the new pot and position your orchid in the center, spreading out its roots. Fill the pot with additional mix, making sure the roots are fully covered but leaving some space at the top to prevent overflow when watering.
Once potted, water your orchid thoroughly but allow excess water to drain out completely. Find a suitable location for your orchid, providing the right balance of light and humidity. Finally, monitor your orchid regularly, adjusting care as needed to help it thrive in its new home. With these steps, you'll be well on your way to potting your orchids with success.
Frequently Asked Questions
Can I Reuse Old Potting Mix for My Orchids, or Should I Always Start With Fresh Mix?
You can reuse old potting mix for your orchids if it's still in good condition. Just refresh it by removing any dead roots and adding some fresh mix. This way, you can save money and give your orchids a healthy environment to grow in.
How Often Should I Repot My Orchids, and How Can I Tell When It's Time?
You should repot your orchids every 1-2 years or when the potting mix breaks down, roots outgrow the container, or the plant becomes unstable. Signs include roots growing over the pot's edge, lack of growth, or water running straight through the pot.
Are There Any Specific Types of Pots That Are Best for Orchids, or Can I Use Any Container?
For orchids, it's best to use pots with good drainage like clear plastic or clay. These allow airflow to roots. Containers without drainage can cause root rot. Opt for suitable pots to keep your orchids healthy and thriving.
What Should I Do if My Orchid's Roots Are Growing Outside of the Potting Mix?
If your orchid's roots are growing outside the potting mix, gently repot it into a slightly larger container. Trim any dead roots, provide proper drainage, and use a suitable orchid potting mix to guarantee healthy growth and development.
Is It Necessary to Sterilize the Potting Mix Before Repotting My Orchids to Prevent Pests and Diseases?
Indeed, it is crucial to sterilize the potting mix before repotting your orchids. This procedure helps prevent pests and diseases from affecting your plants. By carrying out this step, you guarantee a healthy environment for your orchids to flourish.
Conclusion
To sum up, mastering orchid potting mix involves understanding the basics, selecting the right materials, and incorporating enhancements for successful growth. By following these step-by-step guidelines, you can guarantee your orchids thrive in a well-balanced potting mix.
Remember to adjust pH levels, test consistency, and pot your orchids carefully for best results. With proper care and attention to detail, you can enjoy beautiful and healthy orchids in your home.


 Lalmon LLC. All rights reserved